
How to Make a Pond Swimmable
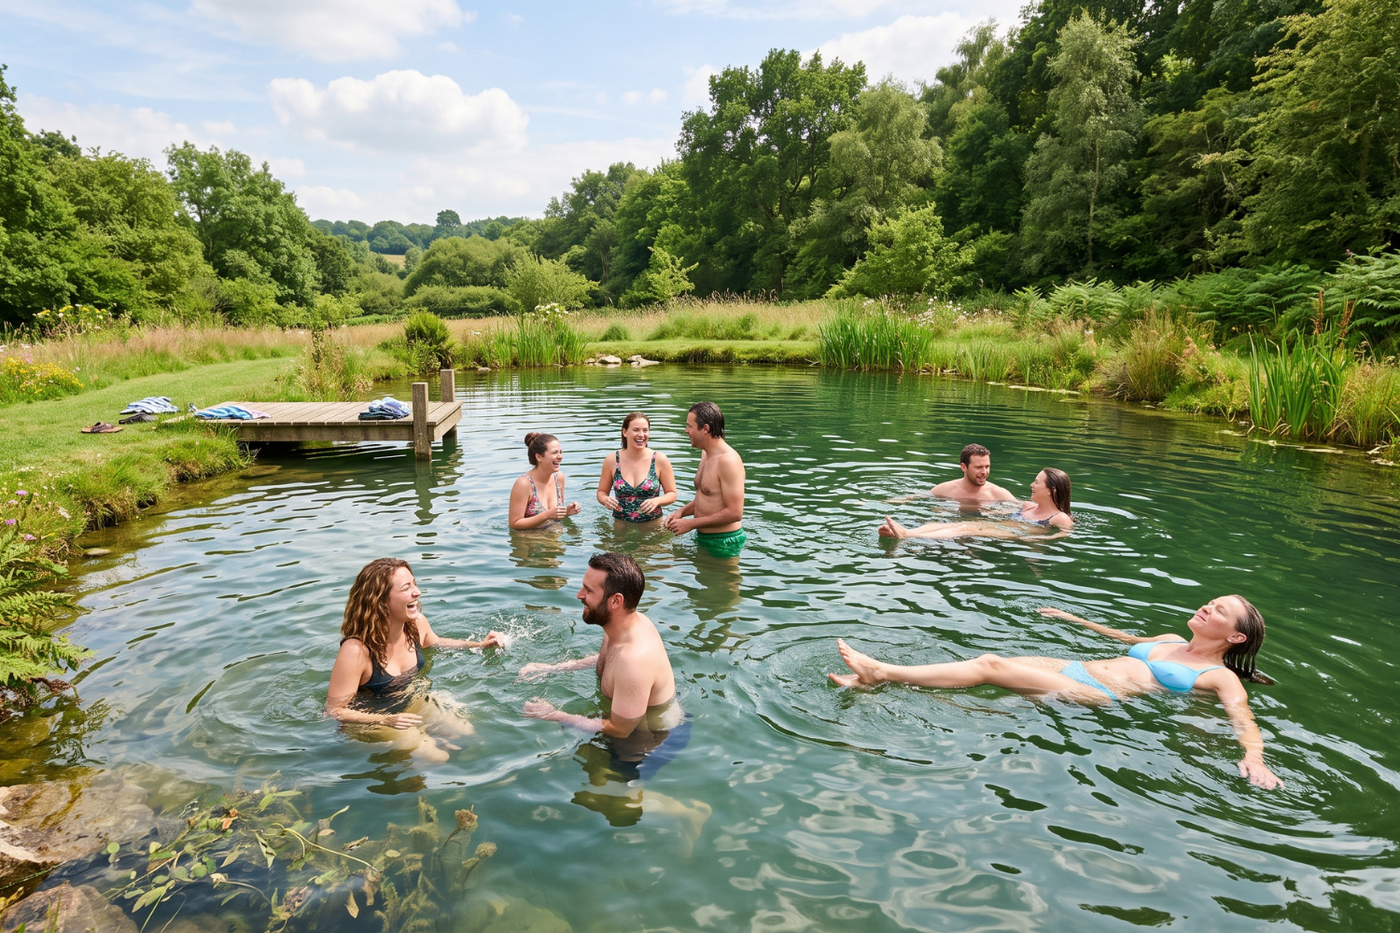

If your pond sits on a property where you've always imagined swimming, you're not alone, and converting it is more achievable than most owners expect. A swimmable pond relies on biological filtration and oxygen-rich circulation working together as a continuous treatment system. Size the planted regeneration zone for the pond's nutrient load, creating colonization surfaces across gravel and plant roots. Beneficial bacteria then convert ammonia into nitrite and nitrate, allowing aquatic plants to absorb nutrients for healthy growth.
Understanding how to make a pond swimmable starts with a filtration system built around a properly sized pump that moves water through the regeneration zone. Mechanical filtration captures suspended debris before it settles, helping the living system manage dissolved waste. Because beneficial bacteria depend on oxygen, an aerator sustains biological activity throughout the treatment area. Microbial testing confirms water quality, and stable access points prepare the swimming area for regular use.
Can You Make an Existing Pond Swimmable?
You can convert many existing ponds after confirming that the basin can support swimming and biological treatment. If you plan to build a natural swimming pond from an existing basin, start with four connected checks:
- Trace the water source: Identify springs, wells, and surface runoff because each source introduces a different nutrient load.
- Measure the basin: Confirm at least 5.5 feet of swimming depth so swimmers have clearance above bottom hazards, then record the surface area available for both zones.
- Map nearby drainage: Locate every route that reaches the water, then inspect the banks for erosion after rainfall.
- Examine swimming access: Check the bottom for deep muck, sharp debris, and unstable slopes before positioning steps or a dock.
Heavy rain can carry animal waste into natural swimming areas, so runoff controls protect the treatment system from sudden contamination. A firm entry area gives swimmers a predictable route into deeper water and supports securely anchored steps. Re-profiling may be necessary to create a natural swimming pool when the original banks leave little room for treatment zones.
How a Natural Swimming Pond Maintains Clear Water
A natural swimming pond relies on a balanced ecosystem that controls nutrients to keep the water clear. Plants absorb available nutrients through their roots, and biofilm covers gravel throughout the regeneration zone. Water moving across those surfaces brings dissolved waste into contact with aerobic bacteria for biological treatment.
The planted zone commonly occupies about 40% to 50% of the total surface area, giving the living filter enough room to manage nutrients. An undersized zone leaves excess nutrients available for algae growth because fewer roots and biofilm surfaces perform treatment, and once algae takes hold, it can rapidly reduce water clarity and make swimming unpleasant. Heavy bather loads can increase the required regeneration area to 60% or more because more swimmers introduce a greater treatment load.
Continuous oxygenation supports bacterial activity throughout the gravel bed as pond water moves into the regeneration area. Treated water returns to the pool area through a controlled circulation route after passing through the plant beds.
How to Make a Pond Swimmable in 9 Steps

Begin the nine-step pond conversion by documenting existing water conditions, then use those results to guide construction planning and equipment selection.
1. Test the pond water
Test the water before excavation or equipment purchases so the design responds to actual pond conditions. Laboratory analysis should cover microbial indicators when animals, septic systems, or stormwater influence the basin.
Record pH and nutrient results because the baseline reveals whether filtration changes water chemistry after installation. Pair pathogen testing with visual inspections and circulation checks, then repeat the same laboratory method after installation for a consistent comparison.
2. Control runoff and external nutrients
Redirect surface drainage around the pond with grading or planted buffer areas suited to the property. Stabilize exposed soil along the banks so rainfall carries less sediment into the swimming zone. Manage livestock and wildlife access through practical barriers placed around the primary water source.
A vegetated buffer slows stormwater and filters sediment before runoff reaches the pond during rainfall, which matters because even a single heavy rain event can spike nutrient levels and undo weeks of biological treatment.
Preserve existing plants where they support the drainage plan, then reinforce bare sections with species suited to local soil conditions. Concentrated flow may require a level spreader or another engineered control before it enters the buffer. Runoff control reduces the nutrient load before filtration begins, allowing the regeneration zone to work within its designed capacity. Use local drainage rules to determine the final route and required erosion controls for the property.
3. Remove muck and organic debris
Remove accumulated leaves, branches, and bottom sediment from the basin before building the new treatment system. Decaying organic matter releases nutrients and consumes oxygen, which directly undermines the bacteria your biological filter depends on. An oxygen-depleted system stops treating waste effectively, and the result shows up as murky water and algae growth that no amount of equipment adjustment will fix.
A sediment survey can identify deeper deposits that require professional removal before construction begins. Preserve stable shelves or habitat features that support the finished design, then shape a clean swimming bottom for the selected liner system.
4. Establish the swimming and regeneration zones
Separate the swimming area from the regeneration zone with a submerged wall that allows controlled exchange. The barrier keeps loose gravel within the plant beds, creating firmer footing across the main swimming area. Build shelves at varied depths so each aquatic plant receives enough water coverage to establish healthy roots.
Place the pump intake where it draws water evenly from the swimming zone without disturbing the planted shelves. Return treated water through balanced outlets on the opposite side to create a complete circulation path. A natural swimming pool design can integrate both zones within one liner and preserve their distinct functions.
5. Build the biological filtration zone
Fill the regeneration area with washed gravel or specified filtration media that offers broad colonization surfaces. More colonization area supports additional biofilm, increasing contact between circulating waste and aerobic bacteria.
Arrange aquatic plants according to mature size and preferred depth, giving roots access to flowing water. Use water lilies for selected surface shade rather than primary gravel-bed treatment across the planted area. Marginal and submerged plants support nutrient uptake as water circulates through the regeneration zone.
| Biological Component | Function | Water-Clarity Effect |
|---|---|---|
| Plant roots | Absorb available nutrients | Direct nutrients into plant growth |
| Gravel or filter media | Supports biofilm | Expands the active treatment area |
| Aerobic bacteria | Transform dissolved waste | Stabilize the nutrient cycle |
| Regeneration zone | Houses the living filter | Treats circulating pond water |
Choose locally appropriate aquatic plants that fit the climate and pond design before placing them in the gravel. A diverse planting plan can occupy multiple depths and preserve open water around the return. Seasonal thinning exports nutrients stored in mature plant growth and keeps return outlets open.
6. Oxygenate the biological system
Select aeration after measuring depth and mapping the basin shape across every planned treatment zone, because the wrong choice for your depth means parts of your pond stay oxygen-depleted no matter how well the rest of the system is designed. A surface aerator transfers oxygen through agitation in shallower water, and a subsurface system lifts deeper water from bottom diffusers. Long or irregular ponds may need more than one circulation point because weak movement lets oxygen levels fall within isolated coves.
An aerating fountain combines meaningful surface aeration with a visible spray display for installations where both matter. A dedicated aerator prioritizes water health, making it the stronger choice when the design requires full-column circulation. Decorative fountains provide a visual focal point but should not be counted on for aeration; they move surface water without the biological treatment a swimming pond needs.
| Equipment | Primary Function | Appropriate Role |
|---|---|---|
| Surface aerator | Transfers oxygen at the surface | Best for water under 6–8 feet deep |
| Subsurface aerator | Lifts water from bottom diffusers | Best for water over 6–8 feet deep |
| Aerating fountain | Combines aeration with display | Serves dual-purpose installations |
| Decorative fountain | Produces varied spray patterns | Visual focal point only, not an aeration substitute |
Deeper ponds gain stronger bottom-to-surface movement from a dedicated subsurface aeration system, where rising bubbles from the pond floor pull oxygen-depleted water upward and replace it with oxygenated water from the surface.
7. Add debris and ultraviolet control
Install a pond skimmer where prevailing wind or return flow carries floating leaves toward the intake. An intake screen protects the pump from larger solids, and a mechanical filter captures suspended particles before they reach the biological zone, reducing the treatment load on your bacteria and plants. Ultraviolet treatment controls free-floating algae as water passes the lamp chamber before returning to the swimming area.
| Treatment Component | Function | System Benefit |
|---|---|---|
| Surface skimmer | Captures floating debris | Reduces incoming organic material |
| Intake screen | Blocks larger solids | Protects downstream equipment |
| Mechanical filter | Traps suspended particles | Improves visible clarity |
| Ultraviolet clarifier | Exposes passing water to ultraviolet light | Controls free-floating algae |
Place each unit where routine cleaning remains easy, since accumulated debris can restrict water flow and reduce treatment effectiveness.
8. Size the pump and circulation route
Calculate pond volume before selecting a pump, then account for elevation and plumbing resistance. Head height reduces delivered flow, so size the pump for the actual installation route rather than its unrestricted rating. A pump that looks adequate on paper can underperform once it's pushing water up elevation and through bends, leaving your regeneration zone chronically under-supplied. An undersized pump sends too little water through the regeneration zone, reducing nutrient contact with plant roots and biofilm.
External pumps are preferred for swim ponds because they keep serviceable equipment outside the swimming area. A submersible model requires direct manufacturer approval for the intended swimming application before installation begins. Keep electrical controls accessible from dry ground throughout maintenance, and use factory-supplied cable lengths. Water should enter the treatment zone evenly and return across the swimming area through balanced outlets to circulate treated water into every corner of the basin.
9. Verify water quality before swimming
Operate the complete filter system long enough to establish steady circulation before collecting final samples. Use the same laboratory and test method from the baseline assessment for directly comparable results. Compare microbial results, pH, and visible clarity against the project's established swimming criteria before opening the pond.
Inspect the edge of the pond for stable footing, then confirm that steps and depth markers remain visible. Record pump flow and aerator operation during the same inspection to connect water results with equipment performance. A dated operating log helps identify water changes after storms or periods of heavy swimming use.
When Does a Swimmable Pond Need a Liner?

Building a natural pool requires a liner when the soil allows seepage or the design requires controlled separation between zones. A swim pond liner creates a stable boundary between pond water and surrounding soil, which matters not just for water retention but for maintaining the consistent depth your biological filter was designed around.
Protective underlayment shields the material from roots and angular stones across the prepared basin. Ethylene propylene diene monomer (EPDM) accommodates irregular shapes and detailed shelves through its flexibility, reducing stress around curves. Reinforced polyethylene resists punctures across installations with exposed structural transitions. Match material thickness and seaming methods to the basin design because weak joints can allow seepage beneath the swimming area.
Cover exposed edges with coping or natural stone to protect the material and create a finished transition. Pond depth, shelf geometry, and planned penetrations determine the required liner dimensions before ordering begins. Purpose-made pond liners provide options for different basin sizes and specific construction requirements throughout installation.
How to Clean a Pond for Swimming
If you're learning how to clean a pond for swimming, focus on removing organic material before it overwhelms the biological system. Skim floating leaves before they sink, then empty mechanical filters according to collected debris. Remove settled material from accessible zones with equipment designed to protect lined pond surfaces.
| Frequency | Maintenance Task |
|---|---|
| Before each swim | Inspect access points and visible water conditions |
| Weekly | Remove floating debris and check circulation |
| Monthly | Test water and service mechanical filtration |
| Seasonally | Thin plants and inspect liner edges |
| Annually | Review sediment depth and treatment capacity |
Plant thinning moves stored nutrients out of the regeneration zone and preserves open water around return points. Inspect pump intakes during the same service visit so restricted flow receives prompt attention.
How to Make a Pond Safe for Swimming
Understanding how to make a pond safe for swimming begins with verified water quality and dependable physical access. Complete these checks before opening the pond to swimmers:
- Provide stable entry: Install textured steps or secure a dock that gives swimmers a predictable route into the water.
- Mark changing depths: Place visible indicators around the pool area so swimmers can recognize transitions before entering deeper sections.
- Position rescue equipment: Keep a flotation device or rescue hook within easy reach of the swimming area.
- Protect the electrical system: Install ground-fault circuit interrupter (GFCI) protection and keep controls accessible from dry ground.
- Disconnect powered equipment: Switch off connected equipment whenever swimmers enter the pond, following electrical safety guidance for water environments.
A licensed electrician can apply local code requirements to permanent wiring and position controls for safe access. Measure the complete installed cable route from the motor to the main breaker panel, not just from the nearest wall outlet, because that full distance is what determines whether your wiring gauge can handle the load without voltage drop.
Can You Build an Above-Ground Swimming Pond?
You can build an above-ground swimming pond when an engineered structure supports the full water load. Plan its structural and treatment details as one integrated design:
- Support the basin: Prepare a stable foundation that carries the filled structure and maintains even contact beneath every wall section.
- Protect the liner: Place underlayment along the base, corners, and hardware transitions before fitting the waterproof membrane.
- Route the overflow: Direct excess water toward a stable discharge area that protects the foundation during heavy rainfall.
- Plan dedicated access: Add secured stairs or a purpose-built platform that gives swimmers a comfortable entry route.
- Position the treatment system: Place pumps outside the basin, then connect an adjoining planted bed or separate biological filter.
Use the available surface area strategically so that the treatment zone provides adequate capacity without reducing comfortable swimming space. Distribute returned water across the basin's full length to maintain circulation through the pool area.
The above-ground pond design should receive local structural review because wall height and soil conditions change the required support. Local barrier rules should guide access control around the finished structure and its raised entry platform.
Which Pond Pump and Aerator Support a Swimmable Pond?
Choose the pump from measured treatment flow, total head, and the complete filtration route. A larger motor wastes electricity without delivering better water quality if the plumbing calls for lower flow; what matters is matching the pump's output to what your regeneration zone actually needs to process waste effectively.
Variable-speed control can help tune circulation after the system begins operating under its normal filtration load. Explore pond pumps sized for the required treatment flow as a starting point.
Choose the aerator from pond depth and basin shape, then confirm its oxygen-transfer role within the biological design. A dedicated subsurface system suits deeper water because it circulates the full column from bottom to surface, which is where oxygen matters most for the bacteria doing your biological treatment. A surface model serves shallower zones where agitation at the air-water boundary is sufficient. Compare pond aerators based on water depth and circulation demands before making a final selection.
Find Equipment Suited to Your Swimmable Pond
Pond Haven helps you match equipment to your pond's acreage and depth, with the filtration layout shaping each recommendation. Explore pond pumps sized for the required treatment flow, then compare pond aerators based on water depth and circulation demands. Share your pond measurements and swimming goals with Pond Haven for personal product guidance.
FAQs on How to Make a Pond Swimmable
Can fish live in a swimming pond?
Fish can live in a swimming pond when the biological filter can manage their added waste. If the basin began as a fish pond, include existing stock in the nutrient-load calculation before adding swimmers. Stocking density and feeding increase the nutrient load, so the design should reserve treatment capacity for both fish and swimmers. A balanced pond food web connects fish populations with available habitat and water conditions. Select species suited to local temperatures, then monitor feeding and water results within one management record.
How long does a pond conversion take?
Conversion time depends on excavation, liner work, and the complexity of the treatment system. Biological establishment continues after construction because plant roots and biofilm need time to occupy the regeneration zone, typically several weeks to a few months before the system reaches stable treatment capacity. Final swimming approval should follow stable circulation and satisfactory microbial results from the completed system.
Do you need permission to convert a pond?
Local authorities may regulate excavation, barriers, and water discharge according to the property's location. Projects affecting wetlands or connected waters can enter the Clean Water Act Section 404 permit process. Confirm applicable requirements with the planning office before changing the basin or redirecting runoff across the property.
How often should you test swimming pond water?
Test for Escherichia coli at least once a week throughout the active swimming season because microbial conditions can change between maintenance visits. Collect extra samples after heavy rainfall because runoff can introduce fresh contamination before the next scheduled test. The pond's water-quality record should track results alongside maintenance and operating changes for later comparison.
Back to Top: How to Make a Pond Swimmable: A Step-By-Step Guide