
How to Clean a Pond
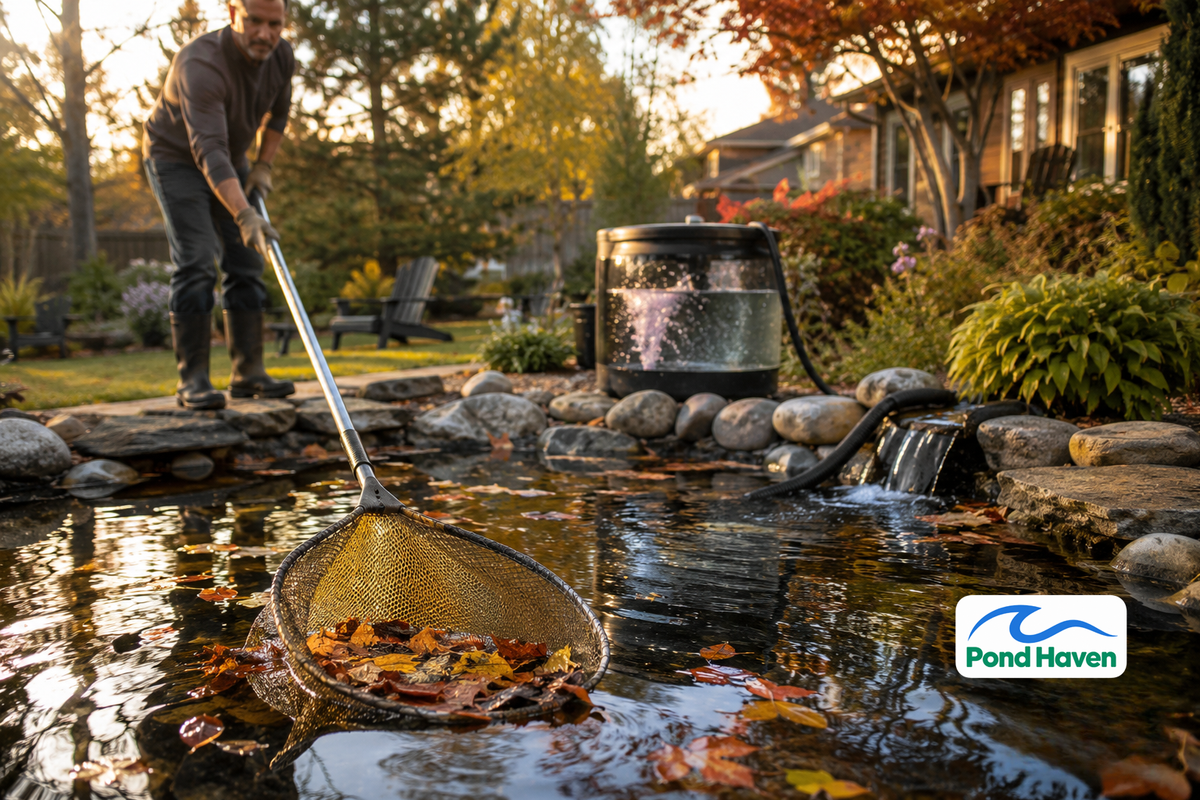

Cleaning a pond is about maintaining biological balance, not just making it look pretty. Every pond accumulates sludge: fish waste, decaying leaves, dead algae, and uneaten food settle on the bottom and slowly decompose. Left alone, that muck consumes oxygen, fuels algae blooms, and can release toxins that harm your fish.
Here's the part most guides get wrong: a complete clean-out is only necessary every 5 years for small ponds and every 10 years for large ponds. Annual scrubbing destroys the beneficial bacteria colonies that keep your water clear. Over-cleaning disrupts the nitrogen cycle and does more harm than good.
This guide walks you through the full process chronologically, with specific chemical dosing data, equipment specs, and safety protocols. You'll know exactly what to do, when to do it, and what not to touch.
- Deep clean-outs are needed every 5–10 years, not annually. Routine maintenance handles most sludge buildup.
- Retain 500–1,000 gallons of original pond water during a clean-out to preserve beneficial bacteria.
- Dechlorinate tap water with sodium thiosulfate: 1 teaspoon (~5 grams) treats roughly 265 gallons.
- Never pressure-wash EPDM or PVC liners. Use a soft nylon brush and rinse with a garden hose.
- Acclimate fish slowly: float bags 15–20 minutes, then drip-mix new water over 1–2 hours.
What Is Pond Sludge and Why Is It a Problem?
Pond sludge, also called muck, is the layer of organic and inorganic matter that accumulates on your pond floor. It's a mix of decaying leaves, fish waste, uneaten food, dead algae, grass clippings, and soil that washes in.
Sludge forms through anaerobic decomposition. When organic matter settles at the bottom, it breaks down without oxygen, producing a dark brown or black layer with a foul, rotten-egg odor. Those gas bubbles rising from the muck are hydrogen sulfide, a byproduct of anaerobic breakdown.
The Consequences of Letting Sludge Accumulate
Sludge is not just ugly. It actively degrades your pond's water quality:
Oxygen depletion. Decomposing organic matter consumes dissolved oxygen (DO). Your fish need 5–8 mg/L of DO to thrive. Below 3 mg/L, they're in danger of suffocation.
Nutrient loading. Sludge releases phosphates and nitrates into the water column. Those nutrients directly fuel algae blooms and unwanted aquatic plant growth.
Toxic gas production. Anaerobic sludge layers produce hydrogen sulfide, which is toxic to fish. Cyanobacteria (blue-green algae) can also release hepatotoxins and neurotoxins dangerous to pets and humans.
Ammonia spikes. Decomposing waste releases ammonia. Unionized ammonia above 0.02 mg/L is harmful to fish, damaging gills and suppressing immune systems.
Fish health decline. High organic loads stress fish, making them more susceptible to Ich (white spot disease) and bacterial infections.
How Much Sludge Is Too Much?
If sludge depth exceeds 2–3 inches across the pond bottom, it's time to intervene. Watch for these visual cues:
- Water clarity drops noticeably
- Fish gasp at the surface
- A foul odor lingers near the pond
- Invasive plants thrive despite routine maintenance
Test your water regularly with a kit that measures ammonia, nitrite, nitrate, and pH. Catching problems early prevents emergency clean-outs.

Tools and Equipment You'll Need
Gather everything before you start. A 30-minute prep saves hours mid-clean and prevents fish loss.
Debris Removal Tools
- Coarse net: For leaves, twigs, and large organic matter
- Fine-mesh net (1/4-inch or smaller): For suspended particles and midwater debris
- Soft-mesh net: For capturing fish without damaging their protective slime coat
- Pond vacuum: A sludge vac that draws slowly to suck out silt and muck. Attach a sludge bag to the waste hose so beneficial organisms aren't discarded with the water
- Pond rake: For manually pulling sludge from shallow areas
Water Management Equipment
- Submersible pump: For ponds up to 2,000 gallons, a 1,000–2,000 GPH pump works. Place it at the deepest point
- Gas-powered trash pump: For ponds over 10,000 gallons. A 2-inch or 3-inch intake handles debris and high flow rates
- Discharge hose: Route it at least 25 feet from the pond
- Dechlorinator: Sodium thiosulfate-based. See dosing below
- Water test kit: API Freshwater Master Test Kit or equivalent
Cleaning and Scrubbing Supplies
- Soft-bristle nylon brush: For liner cleaning
- Stiff-bristle brush: For rocks and gravel
- White vinegar: For mineral deposits (1:1 with water)
- Pressure washer: 1,500–2,000 PSI for concrete or fiberglass ponds. Never use one on EPDM or PVC liners
- Food-grade buckets: 5-gallon minimum
Fish and Plant Transport Gear
- Holding tank: 50–100 gallon stock tank for larger ponds; an aquarium or cooler for smaller ones
- Battery-operated air pump with air stones: Essential for maintaining oxygen during transport
- Clean plastic tubs with tight-fitting lids: Prevents jumping
- Pond water, not tap water: For transport containers
Safety and Personal Protection
- Rubber boots or waders
- Nitrile or rubber work gloves
- Eye protection
- First aid kit
| Tool | Purpose | Specification |
|---|---|---|
| Coarse net | Surface debris | Long handle, sturdy frame |
| Fine-mesh net | Suspended particles | 1/4-inch mesh or smaller |
| Soft-mesh net | Fish capture | Rubber-coated or knotless |
| Pond vacuum | Bottom sludge | Sludge bag attachment recommended |
| Submersible pump | Draining | 1,000–2,000 GPH for ponds up to 2,000 gallons |
| Trash pump | Large pond draining | 5,000+ GPH, 2–3 inch intake |
| Dechlorinator | Tap water treatment | Sodium thiosulfate-based |
| Soft nylon brush | Liner cleaning | Never wire bristles |
| Pressure washer | Concrete/fiberglass only | 1,500–2,000 PSI, never on liners |
The 8-Step Pond Cleaning Process
This is a full clean-out. Expect to spend 4–8 hours on a typical 1,000–2,000 gallon pond. Partial cleanings are covered in the next section.
Step 1: Preparation and Inspection
Choose the right day. Pick a mild, overcast day between 60–75°F. Avoid extreme heat above 85°F and freezing temperatures. Temperature stress kills fish faster than dirty water.
Test your water first. Measure pH, ammonia, nitrite, nitrate, and temperature before you start. This gives you a baseline for comparison after refilling.
Inspect your equipment. Check the pump, filter, and skimmer function before draining. Identify damaged liner areas, sharp rocks, or unstable edging.
Plan your water discharge. Never drain into storm drains or waterways. Check local regulations first. If no chemical treatments have been used recently, drained water can irrigate your lawn or garden.
Turn off all electrical. Disconnect the pump, filter, UV clarifier, and any lighting.
Step 2: Safely Relocating Fish and Plants
Relocation triggers cortisol release in fish, which suppresses their immune system. Handle them carefully.
Fish relocation protocol:
- Use a soft-mesh net (rubber-coated or knotless) to capture fish
- Move them to a holding tank filled with existing pond water, never fresh tap water
- Maintain aeration with a battery-operated air pump and air stones
- Cover the tank with a net or screen to prevent jumping
- Keep the tank in shade; monitor water temperature
- Do not feed fish during the cleaning process
Stocking density: One small koi (under 6 inches) needs at least 5 gallons of transport water. Larger fish require proportionally more volume. Koi (Cyprinus rubrofuscus) need 10 gallons per 6-inch fish minimum. Goldfish (Carassius auratus) are hardier but still need aeration.
Plant relocation:
- Remove potted plants to a shaded area, keeping roots moist
- Marginal plants (cattails, irises, pickerel weed) can be wrapped in damp newspaper and kept in shade for up to 24 hours
- Floating plants (water hyacinth, water lettuce) go in buckets of pond water
- Submerged plants (anacharis, hornwort) also go in buckets of pond water
Retain 500–1,000 gallons of original pond water in the holding tank. This preserves beneficial bacteria and makes fish acclimation easier.
Fish produce metabolic ammonia even when unfed. A neutralizer keeps levels safe during the hours they spend in the holding tank.
Step 3: Draining the Pond and Water Management
Drain to the appropriate level. For a full clean, drain completely. For a partial clean, drain 50–75%.
Pump placement. Put the pump at the deepest point. Use a discharge hose routed at least 25 feet from the pond. Drain slowly to avoid sucking up any remaining fish and to prevent liner damage.
Water disposal options:
- Garden irrigation (if no chemical treatments used recently)
- Lawn watering
- Evaporation pond or dry well
- Never into storm drains, waterways, or sewer systems without checking local codes
Save some pond water. Keep 10–20% of the original water in the holding tank for fish. This preserves beneficial bacteria.
Inspect the liner as the water level drops. Look for tears, punctures, or lifted edges. A properly cleaned liner is easier to inspect.
Step 4: Removing Debris and Sludge
Start with surface debris. Use a coarse net to remove leaves, twigs, and large organic matter. Follow with a fine net for suspended particles.
Vacuum the bottom. Work from the shallow end toward the deep end. Use overlapping passes so you don't miss spots. Empty the collection bag or canister regularly.
Assess sludge depth. If sludge exceeds 3 inches, consider a Bacillus-based sludge-removing bacteria treatment after refill. These products liquefy organic matter over several weeks.
What NOT to remove:
- A thin layer (1/4 inch or less) of beneficial bacteria on the liner
- Established biofilm on rocks (this is your biological filter)
Disposal. Leave extracted sludge at the water's edge for a day so small pond life can return to the water. Then compost it if it's mostly plant matter, or bag it with yard waste.
Step 5: Cleaning the Liner, Gravel, and Rocks
Liner cleaning. Use a soft-bristle nylon brush and rinse with a garden hose. For mineral deposits, use white vinegar (1:1 with water) and rinse thoroughly. Never use soap, detergents, or bleach. Residue is toxic to fish.
Pressure washer guidance:
| Surface | Safe PSI | Notes |
|---|---|---|
| Concrete or fiberglass pond | 1,500–2,000 PSI | Keep nozzle at least 12 inches from surface |
| EPDM or PVC liner | Do NOT use | Risk of punctures, especially on liners over 10 years old |
| Gravel and rocks | 1,500–2,000 PSI | Rinse in a wheelbarrow or bucket |
Gravel cleaning. Remove gravel in small batches. Rinse in a wheelbarrow or bucket with a hose. No soap or detergent. Consider replacing gravel if it's heavily compacted with sludge.
Inspect and repair. Patch liner tears with a pond liner repair kit. Replace damaged rocks or edging. If the liner shifted, reposition and smooth out wrinkles.
Step 6: Maintaining Filters, Pumps, and Skimmers
Filter cleaning. Rinse biological filter media in a bucket of pond water, never tap water. Tap water's chlorine kills the beneficial bacteria colonies you're trying to preserve.
Flow rate standards. Your filtration should move approximately 1.5 times the pond volume per hour. A 15,000-gallon pond needs a target flow rate of 22,000 GPH.
UV clarifier maintenance. Replace UV bulbs every 18–24 months. Their algae-killing capacity diminishes significantly after 18 months, even if the bulb still appears lit.
Pump and skimmer cleaning. Remove accumulated debris. Inspect impellers for clogs and wear. Clean skimmer baskets and check the skimmer throat for blockages.
Check plumbing. Bottom drains are typically 4-inch outlets. Midwater drains are 2 inches. Return inlets are 3 inches. Drain outlets should come out at a 22.5-degree angle to prevent debris entrapment.
Step 7: Refilling, Dechlorinating, and Stabilizing Water
Refill slowly. Fast water flow erodes the liner, gravel, and planted shelves. For large ponds, use a hose attachment filter with activated carbon to treat water as it fills.
Dechlorination is critical. Municipal tap water contains chlorine and chloramine, both toxic to fish gills, slime coats, and beneficial bacteria.
Chlorine vs. chloramine:
- Chlorine evaporates naturally in 12–48 hours with aeration and sunlight
- Chloramine does NOT evaporate. It must be chemically neutralized
Sodium thiosulfate dosing:
- 0.1 grams neutralizes 1 ppm chlorine in 10 gallons of water
- 1 teaspoon (~5 grams) treats approximately 265 gallons (1,000 liters)
- Reaction time: 30–60 seconds
Alternative dechlorinator. Ascorbic acid (Vitamin C) works too. It requires 10–30 minutes for reaction and avoids secondary ammonia release. Dosage is roughly 5 mg per 1 ppm chlorine per liter.
Re-establish the nitrogen cycle. Add pond starter bacteria after refilling. Use "Cold Water" or "Spring & Fall" bacteria during seasonal transitions to jumpstart the cycle before fish feeding resumes.
Pond salt for fish-heavy ponds. Maintain salinity between 0.06% and 0.1% using pure pond salt. This reduces fish stress and supports healthy slime coats.
Step 8: Reintroducing Fish and Plants
Acclimation protocol:
- Float fish bags for 15–20 minutes to equalize temperatures
- Gradually mix small amounts of new pond water into the transport container
- Replacement water must match pond temperature within 1–2 degrees
- Add water slowly via a drip method over 1–2 hours to minimize shock
Post-release monitoring. Observe fish for at least 1 hour after release. Maintain a quiet recovery period of 24–48 hours with dim lighting and minimal feeding. Monitor ammonia, nitrite, and pH daily for the first week. Delay full feeding for 24–48 hours.
How Often Should You Clean Your Pond?
Routine Maintenance (Monthly or Bi-Monthly)
Routine maintenance focuses on water quality stabilization, not full draining. It includes skimmer and pump cleaning, debris removal, plant trimming, topping off water levels, and eco-safe water treatment dosing. No fish relocation or liner exposure needed.
Complete "Drain and Clean" (Every 5–10 Years)
Complete clean-outs are generally only needed every 5 years for small ponds and every 10 years for large ponds. This is a major shift from the old annual-scrub model. Over-cleaning disrupts established biological balances.
A full clean-out is necessary when:
- Muck visibly reduces water depth
- Foul odors are noticeable
- Invasive plants thrive despite routine maintenance
Seasonal timing. Early autumn is optimal for major overhauls because pond wildlife is less active and breeding cycles are undisturbed. Spring is the best time to reset a koi pond after winter, restoring clarity and preparing the ecosystem for the growing season.
- Routine maintenance: monthly or bi-monthly
- Deep clean-out: every 5 years (small ponds), every 10 years (large ponds)
- UV bulb replacement: every 18–24 months
- Filter media rinse: each spring, in pond water
- Water testing: weekly during active seasons

Special Scenarios and Advanced Tips
Stormwater Pond Standards
If you own a stormwater detention pond, different rules apply. These ponds are regulated infrastructure, not just water features.
- Sediment maintenance is required when accumulated sediment noticeably reduces the pond's designed depth
- Trash accumulation triggers maintenance when it becomes a visible problem or impedes water flow
- Stormwater ponds should be dredged roughly every 10 years to restore flood-control volume
- Above-water slopes should be 3:1 (3 feet of run per 1 foot of rise); below-water slopes should be 2:1
Copper Sulfate: Use With Caution
Copper sulfate is used for algae control, but it's highly toxic to fish. Trout, koi, and juvenile fish are especially sensitive. Most "fish kills" after copper sulfate application are caused by oxygen depletion from the sudden death and decay of algae, not direct copper toxicity.
Copper is an element. It does not break down. It accumulates in sediment with repeated applications. If you use it, follow the label exactly. Required PPE includes goggles or a face shield, long-sleeved shirt, long pants, and chemical-resistant gloves at least 14 mils thick.
Professional Services
Professional pond cleaning services cost upwards of $950 per session. They provide detailed pond inspection and system assessment, full draining and pressure washing, gravel cleaning and plant resetting, water detoxification, and hardware checks on docks, fountains, aeration systems, and lighting.
For most residential ponds, DIY cleaning with the right tools and this guide is entirely doable. Consider professionals for very large ponds (10,000+ gallons) or if you're physically unable to handle the work.
Emerging Natural Methods
Polyester quilt batting. Wrap high-quality polyester quilt batting around your submersible pump or place it in the skimmer box. This fish-safe, DIY mechanical filter traps fine algae particles that standard filters miss. It requires frequent replacement during the initial clearing phase.
Smart pond technology. Aquascape and other manufacturers offer smart-control systems that let you monitor and adjust aeration, lighting, and water treatments via mobile apps. Automated dosing systems maintain clarity throughout summer without manual chemical application.

Frequently Asked Questions
How often should I clean my pond?
Routine maintenance should happen monthly or bi-monthly. A complete deep clean-out is only necessary every 5 years for small ponds and every 10 years for large ponds. Over-cleaning destroys beneficial bacteria and disrupts the nitrogen cycle.
Is pond sludge harmful to fish?
Yes. Sludge decomposition consumes dissolved oxygen, releases ammonia and hydrogen sulfide, and fuels algae blooms. If sludge depth exceeds 2–3 inches, it's time to intervene. A thin layer of biofilm (1/4 inch or less) is beneficial and should be left alone.
What's the difference between chlorine and chloramine?
Chlorine evaporates naturally in 12–48 hours with aeration and sunlight. Chloramine does not evaporate and must be chemically neutralized with sodium thiosulfate. Breaking the chloramine bond releases ammonia, so test ammonia levels the day after treatment.
Can I use rainwater to refill my pond?
Yes. Collected rainwater is free of chlorine and chloramines, making it ideal for refilling after a clean-out. It's a water-conservation best practice. If you must use tap water, always dechlorinate with sodium thiosulfate.
Can I pressure-wash my pond liner?
Never use a pressure washer on EPDM or PVC liners. The risk of punctures is too high, especially on liners older than 10 years. Use a soft-bristle nylon brush and rinse with a garden hose. Concrete and fiberglass ponds can handle 1,500–2,000 PSI.
Printable Cleaning Checklist
Before you start:
- Test water quality (pH, ammonia, nitrite, nitrate)
- Calculate pond volume (L × W × avg depth × 7.48)
- Check local discharge regulations
- Gather all tools and equipment
- Turn off all electrical equipment
- Choose a mild day (60–75°F)
Fish and plant relocation:
- Fill holding tank with original pond water
- Set up battery-operated air pump and air stones
- Move fish with soft-mesh net
- Cover tank to prevent jumping
- Move plants to shaded containers with pond water
- Retain 500–1,000 gallons of original water
Draining and cleaning:
- Drain slowly with pump at deepest point
- Inspect liner as water level drops
- Remove surface debris with coarse net
- Vacuum bottom sludge in overlapping passes
- Clean liner with soft nylon brush (no soap)
- Rinse gravel in batches (no pressure washer on liners)
- Clean filters, pumps, and skimmers
- Replace UV bulb if over 18 months old
- Patch any liner tears
Refilling and recovery:
- Refill slowly
- Dechlorinate with sodium thiosulfate (1 tsp per 265 gallons)
- Add pond starter bacteria
- Test ammonia the day after treatment
- Acclimate fish (float 15–20 minutes, drip-mix 1–2 hours)
- Monitor water quality daily for one week
- Delay feeding for 24–48 hours
A clean pond is a balanced pond. Skip the annual scrub, manage sludge before it becomes a problem, and your fish and plants will thrive for years.