
How to Install a Pond Liner
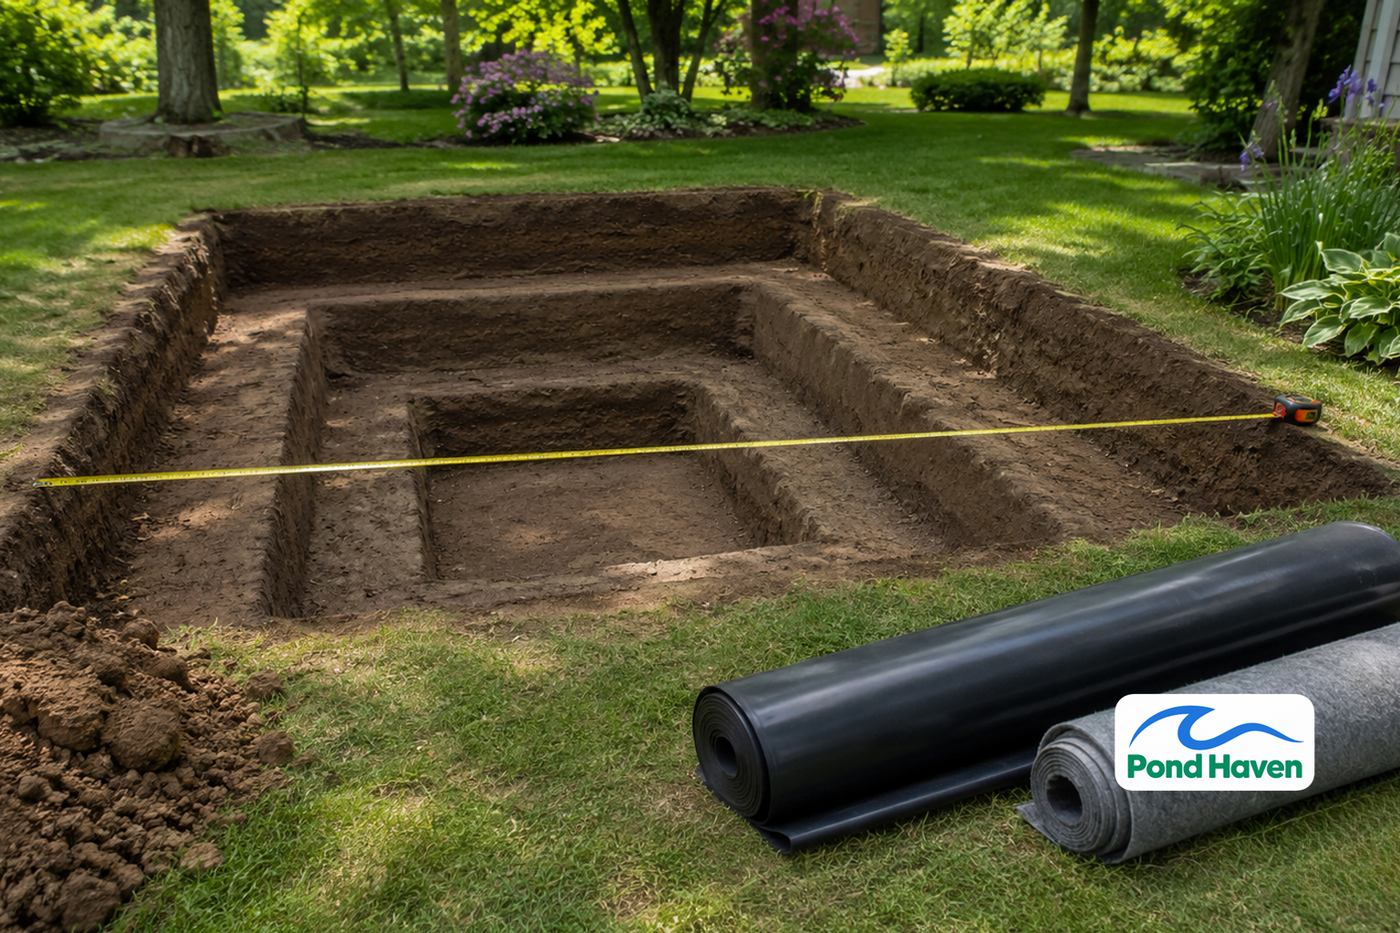

Your pond liner is the single most important component of your water garden. Get it right, and you'll enjoy a leak-free pond for 20 to 30 years. Get it wrong, and you're facing wrinkles, punctures, and a costly re-do that can double your expenses.
A typical DIY installation for a 6' x 8' pond takes 2 to 4 days from excavation to final fill. Liner material costs run about 15 to 25% of your total pond budget, so sizing errors hurt twice: once in wasted material, once in replacement labor.
This guide walks you through every step: planning, material selection, excavation, liner placement, the fill-and-adjust method, and finishing. Follow it precisely, and your liner will outlast your patience for maintenance.
- Calculate liner size as Length + (2 x Depth) + 2 feet overlap, and measure after digging whenever possible.
- Geotextile underlayment is mandatory, not optional. It protects against the most common cause of leaks: punctures from rocks and roots.
- Fill the pond slowly and smooth wrinkles from the bottom up as water weight seats the liner.
- Dig an anchor trench 12 inches deep and 12 inches wide around the perimeter to secure edges.
- Use GFCI-protected outlets and keep them well back from the water's edge. Have an electrician confirm your local code.
Pre-Installation Planning
How To Choose the Best Pond Location
Start with sunlight. Ponds with fish or aquatic plants need about 6 hours of direct sun per day. Flowering plants like water lilies (Nymphaea spp.) need a minimum of 4 hours of direct sun to bloom. If your site gets only 3 to 5 hours, plan on adding a waterfall or fountain for aeration to compensate for reduced plant oxygenation.
Avoid placing the pond directly under trees. Falling leaves decompose and create excess nutrients, which fuels algae blooms and throws off water chemistry. Large tree roots can also physically damage your excavation over time. Holly leaves are especially problematic: they produce toxic substances as they rot in pond water.
Steer clear of low-lying areas that collect runoff. Floodwater brings chemical residues and sediment straight into your pond.
Before you dig, call 811. That's the national "Call Before You Dig" hotline, and it's a legal requirement in most states. Utility locators will mark underground lines on your property for free. Hitting a gas line or power cable turns a weekend project into a very expensive mistake.
Safety and Electrical Considerations
Every pump, fountain, and light in your pond needs a GFCI-protected outlet. This is not optional. Keep receptacles well back from the water's edge, use PVC conduit for buried wiring, and have a licensed electrician confirm your installation meets local code.
Here's the critical safety warning: a fish may survive a short circuit because the liner insulates the water, but a person touching that water completes the circuit to ground. The result can be fatal electrocution. Never skip the GFCI.
Check your local building codes before digging. Many municipalities regulate maximum pond depth and require fencing or protective barriers for ponds deeper than 24 inches, especially in households with children. Some areas require permits for ponds above a certain surface area. Also install an anti-siphon device on any faucet supplying the pond to prevent backflow contamination of your domestic water supply.
Choosing Your Liner and Materials
Liner Material Comparison
Flexible liners have largely replaced rigid preformed shells for custom garden ponds. They conform to any shape and offer superior durability. Here's how the main options stack up:
| Material | Durability | Flexibility | Cost per sq ft | Seaming Method | Lifespan |
|---|---|---|---|---|---|
| EPDM (45 mil) | Excellent | Excellent, stays flexible in cold | Moderate | Seam tape + primer | 25-year guarantee |
| RPE | Excellent puncture resistance | Stiff, less forgiving in corners | Moderate | Heat welding | 20-25 years |
| HDPE (20 mil) | Good | Stiff | Budget-friendly | Heat welding | 25-40 years |
| PVC | Fair | Good | Lowest | Solvent welding | 10-15 years |
| Butyl rubber | Excellent | Excellent | Premium | Welding tape | 20-year guarantee |
EPDM is the most popular choice for DIY ponds, and for good reason. It's extremely flexible, UV-treated, and carries a standard 25-year guarantee. The 45-mil thickness is the sweet spot for residential ponds. It's heavy, though: a large 45-mil EPDM liner can weigh over 300 pounds, so plan for multiple people or machinery to deploy it.
RPE is lighter and more puncture-resistant than EPDM, but it's stiffer and less forgiving around tight corners. It heat-welds cleanly, which maintains UV and chemical resistance at the seams.
PVC is the budget option. It's flexible and affordable, but less durable and harder to seam reliably. Plan on replacing it sooner.
Butyl rubber is premium grade with a 20-year guarantee, but it requires a minimum 48-hour cure time for seams before you can flood the pond.
Essential Tools and Materials Checklist
- Liner (calculated size, plus 2 feet overlap on each dimension)
- Commercial-grade geotextile underlayment (mandatory)
- 1-2 inches of sand for base cushioning
- Utility knife with fresh blades
- Scissors or shears for underlayment
- Tape measure and level (or 2x4 board with a 4-foot level)
- Shovel and digging tools
- Seam tape and primer (if joining EPDM pieces)
- Boot kits for pipe penetrations (adjustable from 1 inch to over 6 inches)
- Sandbags or rocks for temporary liner securing
- Black waterfall foam sealant for rock-to-liner seals
- Soft-soled shoes for working inside the liner

Step 1: Calculate and Purchase Your Liner
The Liner Sizing Formula
The formula is simple, and getting it wrong is the most common DIY mistake:
Liner Length = Pond Length + (2 x Maximum Depth) + 2 feet overlap
Liner Width = Pond Width + (2 x Maximum Depth) + 2 feet overlap
Here's a worked example. Say you want a pond that's 10 feet wide, 12 feet long, and 2 feet deep at the deepest point:
- Length: 12 + (2 x 2) + 2 = 18 feet
- Width: 10 + (2 x 2) + 2 = 16 feet
- Liner size needed: 18 feet x 16 feet
The 2-foot overlap matters. It gives you material to anchor in the perimeter trench and accounts for the contours of shelves and slopes. Skimp on it, and you'll stretch the liner thin, which leads to stress points and eventual leaks.
A 10' x 10' liner creates a finished pond roughly 6' wide x 6' long at 18 inches deep. Use that as a sanity check on your math.
Step 2: Excavate the Pond
Digging Depth and Shelving
For a fish pond, dig to a minimum depth of 24 inches. In colder climates where you'll overwinter fish, go 24 to 30 inches deep so the pond doesn't freeze solid. Koi need 24 to 36 inches minimum.
Cut plant shelves 8 to 12 inches below the water surface and 12 to 18 inches wide to accommodate pots. Marginal and bog plants go on shelves 12 to 18 inches deep. If you're growing lotus (Nelumbo spp.), give them an 18-inch-deep shelf at least 2 feet wide.
Slope the walls at 20 to 30 degrees. Vertical walls collapse and trap wildlife that falls in. Sloped sides give animals an escape route and stabilize the structure.
Preparing the Excavation
Remove every rock, root, and sharp object from the hole. This is not the step to rush. Organic material left in the excavation decomposes and creates voids under the liner. Any void larger than 1 inch must be filled, because the weight of the water pushes the liner into the gap, creating tension that can pull on skimmer and filter connections.
Compact the soil to prevent settling. For large ponds, aim for a high degree of soil compaction. Add a 1- to 2-inch layer of sand over the entire base and compact it. This cushions the liner and smooths minor imperfections.
Check that the rim is perfectly level using a spirit level or string line. An uneven rim means visible liner above the waterline, which degrades faster under UV exposure and looks unprofessional.
Step 3: Install Protective Underlayment
Why Underlayment Is Mandatory
Many liner leaks are caused by external factors like animal claws, shifting rocks during winter freezes, and invasive root intrusion. Geotextile underlayment is your primary defense against all three.
Underlayment costs a fraction of what you'll spend replacing a leaking liner. It's a false economy to skip it. EPDM is flexible but lacks the puncture resistance for direct soil contact. Sand alone won't stop roots or ground movement.
How To Lay Underlayment
Unroll the geotextile fabric across the entire excavation, including the shelves. No soil should remain uncovered. Overlap seams by at least 12 inches. Press the fabric into all contours, starting from the deepest point, and walk through the pond to ensure it conforms to every bend and corner.
Use folds or pleats to prevent bunching. Extend the fabric 12 to 18 inches beyond the pond edge so the perimeter is protected too. Add a second layer in high-stress areas like corners and anywhere near large rocks.
Step 4: Position and Deploy the Liner
Unrolling and Centering the Liner
Choose a calm day. Wind catches a large liner like a sail and turns deployment into a wrestling match. Let the liner sit in the sun for about an hour before installation to increase pliability. If an EPDM liner lacks expected stretch, warming it in the sun fixes that.
Lift and carry the liner into place with at least two people. Never drag it across the ground. Center the liner over the excavation with equal overhang on all sides. Use sandbags, bricks, or rocks to hold the edges in place so it doesn't slide into the hole while you work.
Pressing the Liner into Contours
Work from the center outward. Press the liner into the deepest point first, then work up the shelves and slopes. Wear soft-soled shoes or work in socks to avoid puncturing the material.
Do not stretch the liner. Let it settle naturally into the contours. At corners, create folds and pleats rather than pulling the material tight. A few large folds in out-of-view areas beat many small wrinkles. Natural wrinkles and pleats are acceptable; they allow for ground settling over time.

Step 5: The Fill-and-Adjust Method
How the Fill-and-Adjust Method Works
This is the technique that separates a professional-looking install from an amateur one. The weight of the water does the heavy lifting; your job is to guide it.
Start filling the pond slowly with a garden hose. As the water level rises, the weight of the water pulls the liner into the excavation contours and flattens wrinkles. Stop filling every 2 to 3 inches of depth and smooth out wrinkles by hand.
Work from the bottom up. Push wrinkles outward toward the edges, where they'll be hidden by rocks and plants. Large wrinkles at the bottom are much easier to fix before the pond is full.
Tips for Wrinkle-Free Results
Never pull or stretch the liner while filling. Use your hands to gently push wrinkles toward the edges. Minor wrinkles on the sides will often disappear as the water weight settles the liner. Do not trim the excess liner until the pond is completely full and the liner is fully seated.
Step 6: Install Plumbing and Hardware
Sealing Skimmers and Bottom Drains
Position the skimmer and bottom drain before the final fill. Trace the opening on the liner and cut a hole 1 to 2 inches smaller than the flange. The seal relies on the flange compressing the liner against a flat surface, so a precise cut matters.
Use the manufacturer's boot kit or flange gasket for a watertight seal. Tighten bolts evenly in a crisscross pattern, alternating bolts 180 degrees apart. Tighten in small, even increments. For most residential skimmers and drains, a firm, snug tightening is sufficient. Large flanges (10 inches and larger) require careful tightening to avoid warping. Check your kit's specifications.
Connecting Waterfall and Stream Plumbing
Here's a professional trick that saves you from seaming: the no-seam overlap technique. Lay the pond liner first, extending it up and behind the stream area at a height above the water level. Then lay the stream liner over the pond liner with a 12- to 18-inch overlap. Water flows down the stream liner into the pond, but it can't back up over the pond liner's higher edge. No glue, no seam tape, no leak.
For pipe penetrations, use a bulkhead fitting or liner boot. Boot kits feature a flange with adhesive backing and a stainless-steel clamping ring, and they adjust to fit pipes from 1 inch to over 6 inches in diameter. Apply sealant around all penetrations and allow it to cure before filling.
Black waterfall foam sealant withstands -40°F to 176°F and repeated freeze-thaw cycles. It's UV-stabilized, unlike general-purpose construction foam, so it won't degrade into a crumbly mess within a season.
Step 7: Secure the Perimeter and Finish Edges
The Anchor Trench Method
Dig a trench 12 inches deep and 12 inches wide, positioned 12 inches outside the pond edge. Tuck the liner and underlayment into the trench, lay them across the bottom, and run them up the opposite side. The underlayment should extend a few inches beyond the liner.
Backfill with soil or gravel, compressing it slightly and mounding it to account for settling. This method hides the liner edge and prevents water from wicking under the liner. It's the most reliable perimeter anchor for residential ponds.
Finishing with Rocks and Coping
Place large flat stones along the edge, overlapping the anchor trench. Put an extra layer of underlayment under large stones for cushioning, and trim it close to the stone's base. Use smaller rocks to fill gaps and create a natural look.
Ensure stones overhang the water slightly to hide the liner. The liner must finish above the waterline when using weight-secured edges; otherwise, water soaks away behind the stones. Place large decorative stones before the pond is full, when conditions are dry and you're not working on slippery surfaces. Leave a few shallow areas for wildlife access.

Troubleshooting and Post-Installation Care
How To Find a Leak
A healthy pond naturally loses 1 to 2 inches of water per week to wind and humidity. Anything more suggests a leak.
Let the pond settle for 24 to 48 hours and mark the water level. If the level stabilizes at a certain point, the leak is at that elevation. Check all seams and penetrations first; they're the most common leak points. Look for obvious wet spots around the perimeter.
Use the bucket test to confirm a true leak: fill a bucket with pond water and set it on a shelf in the pond. If the pond level drops faster than the bucket level, you have a leak. If they drop at the same rate, it's evaporation.
Remember: many leaks come from external causes like rocks and roots. Inspect the liner edge for punctures where it meets the anchor trench.
Patching EPDM Liners
Drain the pond below the leak level. Clean the area with water and a soft nylon brush to remove biofilm; the liner should not feel slippery. Let it air dry for 30 minutes. Lightly scuff the surface with 80 to 120 grit sandpaper, extending 2 to 3 inches beyond the damage zone. Apply primer, then seam tape, and press firmly with a seam roller. Cut the patch at least 2 inches larger than the damaged area. Allow 24 hours for the patch to cure before refilling.
Initial Pond Startup
Dechlorinate tap water before adding fish or plants. Run the pump and filter system for 24 to 48 hours before adding fish. Test water chemistry for pH, ammonia, nitrite, and nitrate levels. Add beneficial bacteria to establish the biological filter. Aim for a circulation rate of 1 to 4 turnovers per hour.
Frequently Asked Questions
How long does it take to install a pond liner?
Small ponds up to 100 square feet take 1 to 2 weekends including excavation. Larger ponds take 2 to 4 weekends depending on depth and complexity. The fill-and-adjust process alone can take a full day if you're smoothing wrinkles properly.
Can I install a pond liner over grass or dirt?
No. You must excavate and prepare a smooth, debris-free base with underlayment. Grass decomposes and creates voids under the liner, and roots will puncture it over time. Skipping excavation guarantees a shorter liner life.
How long does an EPDM pond liner last?
20 to 30 years with proper installation and protection. The 25-year guarantee is standard. But that lifespan assumes you used underlayment, avoided stretching the liner during install, and sealed all penetrations correctly.
Do I need underlayment if I use sand?
Yes. Sand alone does not protect against root growth or ground movement. Use both sand and geotextile underlayment for maximum protection. The underlayment is your primary defense against the many leaks caused by external punctures from rocks and roots.
Can I install a pond liner in winter?
It's not recommended. EPDM and other flexible liners become stiff and brittle in cold temperatures, making them prone to cracking during deployment. Wait for air temperatures above 50°F, or warm the liner in a heated garage before installation.
Conclusion
Your pond liner is a 20- to 30-year investment. The extra hour you spend leveling the rim, the extra layer of underlayment in a high-stress corner, the patience to smooth wrinkles as the pond fills: all of it pays off in a pond that holds water season after season.
Measure twice, protect the liner, fill slowly, and seal penetrations properly. Skip any of those steps, and you'll be draining the pond to patch a leak within a few years.
Browse Pond Haven's selection of EPDM liners, geotextile underlayment, and installation accessories to get started. Your pond will thank you for the next three decades.