
How to Drain a Pond
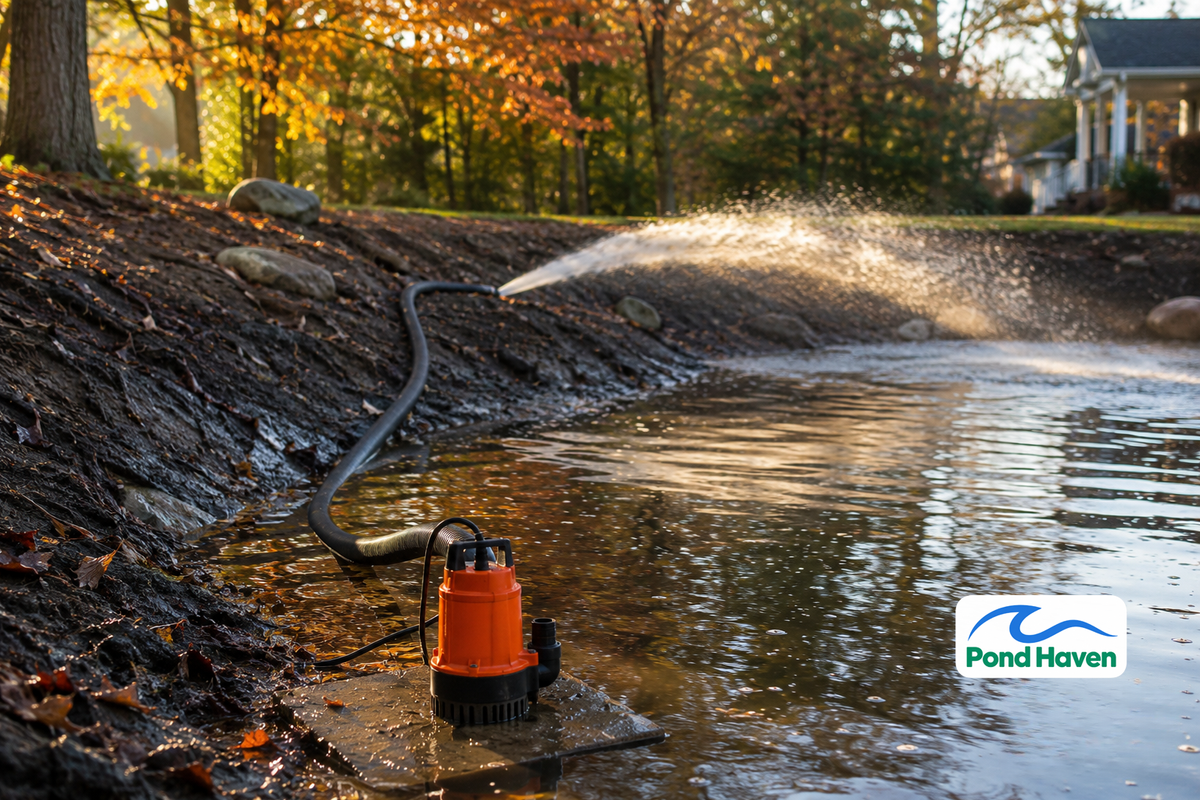

Draining a pond is a big job, but it's one you can handle with the right plan. Whether you're cleaning out a 500-gallon backyard koi pond or a 1-acre farm pond, the process comes down to three variables: water volume, pump flow rate, and total dynamic head (TDH), the resistance your pump must overcome.
This guide walks you through the entire process, from permits and fish relocation to sediment disposal and refilling. You'll get concrete numbers, not vague advice, so you can drain your pond in hours instead of days.
- Calculate your pond's volume first: Length × Width × Average Depth × 7.48 = gallons. This determines pump size and drain time.
- Check local permits before draining. Land disturbance over 1 acre typically requires a permit and a Stormwater Pollution Prevention Plan (SWPPP).
- Relocate fish before water drops below 50% of pond volume. Water holds roughly 95% less oxygen than air, so fish need oxygenated holding tanks.
- Match pump to pond size: submersible electric pumps handle up to 10,000 gallons; gas trash pumps handle larger volumes and debris.
- Never exceed 5 ft/sec flow velocity in PVC pipe. Faster flow causes pressure surges that can damage your discharge line.
Pre-Drainage Assessment & Planning
What Type of Pond Do You Have?
Your pond's construction determines how you drain it and what risks you face.
Embankment ponds are built by damming a depression between two hills. They're the most common type in the southeastern US and the least expensive per surface acre because they need minimal earth moving. Drainage risk: the dam itself. Never plant trees on it, roots cause seepage and falling trees can cause catastrophic failure.
Excavated ponds are dug entirely below ground level. They're typically under 0.5 acre and cost the most per acre due to excavation volume. Drainage is straightforward since you're pumping from a hole in the ground.
Levee ponds sit above original ground level, built for flat land. They need an external water source since they lack a natural watershed. Drainage risk: the sides can slump if you drain too fast.
How to Calculate Your Pond's Volume
You can't pick a pump without knowing your water volume. Use these formulas:
- Rectangular: Length (ft) × Width (ft) × Average Depth (ft) × 7.48 = gallons
- Circular: 3.14 × Radius² × Average Depth × 7.48 = gallons
- Irregular: Break the pond into sections, calculate each, then add them together
For average depth, take at least three measurements (shallow, middle, deep end) and divide by the number of measurements. Most ponds aren't uniform.
Drain time formula: Total gallons ÷ Pump GPH = hours. Add 20–30% for real-world head loss. A 10,000-gallon pond with a 4,600 GPH pump theoretically drains in 2.2 hours, but expect 2.5–3 hours in practice.
Legal & Permit Checks Before You Dig or Drain
Skipping this step can cost you fines and damage neighbor relations.
Land disturbance permits: Many jurisdictions require a permit for any land disturbance of 1 acre or more. Local ordinances often apply this to individual lots or "common plans of development" that reach the threshold in total.
SWPPP requirements: A Stormwater Pollution Prevention Plan is often required for land disturbance activities. It must outline grading activities and Best Management Practices (BMPs) to prevent sediment discharge.
Discharge rules: You generally cannot discharge water onto adjacent property without written consent from the owner. The water must not cause bank failure or sliding on neighboring land. Check whether your pond water counts as "grey water" in your jurisdiction, which may restrict storm sewer discharge.
Fish and wildlife regulations: Some states regulate relocating or disposing of fish. Check with your state fish and wildlife agency before you start.
Where to check: Contact your local conservation district or county planning office. In coastal areas, additional permits may apply.
Selecting Your Discharge Location
Choose your discharge point before you start pumping.
- Distance from water bodies: Stay at least 50 feet from streams or wetlands.
- Soil type: Sandy soils absorb water faster than clay. Clay soils will pool and may cause runoff issues.
- Slope: Avoid steep slopes that will erode under heavy flow.
- Downstream impact: Trace where the water will actually go after it leaves your property.
Equipment Guide: Choosing the Right Pump
Submersible Electric Pumps
Submersible pumps sit directly in the water and push it through a discharge hose. They're quiet, plug-and-play, and ideal for most backyard ponds.
Key specs to compare:
- GPH (gallons per hour): Flow rate at a specific head height
- Head height: How high the pump can push water vertically
- Wattage: Power consumption
- Cord length: Plan extension cord needs; some pumps have 10-foot cords, others 50-foot
Look for these features:
- Float switches: Auto-shutoff when water drops, preventing dry running
- Thermal overload protection: Prevents motor burnout during long drain cycles
- Anti-clogging filter bags: Handle debris without clogging the impeller
For reference, a typical 1 HP submersible pump moves around 6,500 GPH at maximum head, while a 1/2 HP model handles roughly 3,000–4,500 GPH. A 1/3 HP pump delivers a lower flow, typically around 2,000–3,000 GPH. Check the manufacturer's spec sheet for the exact flow curve at your specific head height.
Gas-Powered Trash Pumps
For large ponds, murky water, or locations without power, trash pumps are the answer. They sit on the bank and use a suction hose to pull water, then push it out the discharge.
- Debris handling: Larger impellers handle solids up to 1 inch or more
- Flow rates: 150–300 GPM at 20–30 feet of head
- Agitator models: Stir up sediment for faster drainage
- Fuel: Use ethanol-free gas; check run time per tank
The Honda trash pump is the industry standard for reclaiming neglected water features. Some submersible trash pumps include a built-in agitator to handle sand and solids at flow rates around 2,300 GPH.
Manual Siphoning: The Pump-Free Alternative
Siphoning works for small ponds under 1,000 gallons where no power is available. Gravity pulls water through a hose once primed. Maximum practical lift is about 10 feet at sea level. Flow rates are limited: roughly 15–20 GPM with a 1-inch hose at a 10-foot drop.
Pump Comparison Table
| Pump Type | Best Pond Size | Flow Rate | Max Head | Power Source | Debris Handling | Cost Range |
|---|---|---|---|---|---|---|
| Submersible Electric | Up to 10,000 gal | 1,500–4,500 GPH | 15–30 ft | 110V outlet | Fine sediment only | $100–$400 |
| Gas Trash Pump | 10,000+ gal | 150–300 GPM | 80–100 ft | Gasoline | Up to 1" solids | $300–$800 |
| Siphon Hose | Under 1,000 gal | 10–20 GPH | 10 ft max | Gravity | Clear water only | $20–$50 |
Complete Tool Checklist
- Pump with appropriate discharge hose (match diameter to pump outlet)
- Hose clamps and fittings
- GFCI-protected extension cords rated for outdoor use
- Waders or rubber boots
- Rakes and nets for debris removal
- Holding tanks for fish (100+ gallons recommended)
- Portable aerator or air stones for fish holding
- Shovels for sediment removal
- Trash bags or disposal containers for sludge

Step-by-Step Drainage Process
Stage 1: Preparation and Debris Removal
Clear the pond before you pump. Floating leaves, branches, and algae mats will clog your intake. Remove aquatic vegetation before draining. Large objects on the bottom can damage the pump.
Verify electrical safety: GFCI outlets, dry hands, no standing water near connections. Position the pump on a flat, stable surface. A cinder block or paver keeps the intake above the sludge layer.
Stage 2: Fish and Wildlife Relocation
This is the most time-sensitive step. Move fish before water drops below 50% of pond volume.
Why oxygen matters: Water holds roughly 95% less oxygen than air. Fish gills extract about 80% of the oxygen passing over them, but they still need adequate dissolved oxygen. Target 5–8 mg/L minimum for transport.
Holding tank guidelines: Use at least 2 gallons of water per inch of fish. Shallow, wide containers outperform tall, narrow ones because oxygen enters primarily at the surface. A 20-gallon "long" tank has 360 square inches of surface area versus 288 for a standard 20-gallon.
Aeration: Use battery-powered air stones or portable aerators. Monitor ammonia, nitrite, pH, and oxygen levels during holding.
Temperature matching: Keep the holding tank within 5°F of pond water temperature. Move aquatic plants to buckets of pond water. Relocate frogs, turtles, and newts to nearby water or damp areas.
Stage 3: Pump and Siphon Setup
Place the pump 6–12 inches above the pond bottom to reduce sediment intake. Route the discharge hose as straight as possible, minimizing elevation changes. Match hose diameter to the pump outlet.
Secure the discharge end with a diffuser or splash pad to prevent erosion. For siphons, fill the hose completely with water, cap one end, submerge the upper end, then release.
Stage 4: The Drainage Process
Start the pump and monitor initial flow. Stay with it for the first 15 minutes to verify flow and check for suction leaks.
As water drops, reposition the pump to the deepest remaining pocket. Never let the pump run dry. Most modern pumps have thermal dry-run protection or float switches, but manually shutting off before intake exposure is best practice.
For the last few inches, use a wet/dry shop vac or a low-water-tolerant pump. Some submersible models remove water down to 0.04 inches, ideal for final cleanup.
Stage 5: Sediment and Sludge Management
Pond sludge is decomposed organic matter: leaves, fish waste, algae. Typical depth runs 2–12 inches depending on pond age and maintenance.
Disposal options, ranked by preference:
- Reuse as garden compost (if no chemical treatments were used)
- Spread on lawn as top dressing
- Landfill disposal (check local regulations)
- Incineration (rarely practical for homeowners)
For large ponds, consider a settling basin: 15–20 minutes detention time, 2–3 feet deep, lined with plastic. Let sludge dewater for 2–4 weeks before removal.
Stage 6: Cleaning and Structural Inspection
With the pond empty, you have access you won't get again for years.
- Pressure wash the liner or concrete surface
- Inspect for tears, punctures, or degradation in liners
- Check concrete or fiberglass for cracks
- Inspect the dam or berm for erosion, animal burrows, or tree roots
- Repair minor damage before refilling
Never allow trees to grow on dams. Roots compromise structural integrity. A falling tree can create a hole that leads to catastrophic failure.
Stage 7: Refilling and Restocking
Refill slowly to avoid disturbing sediment and the liner. Dechlorinate tap water: 1–2 ppm chlorine neutralized with sodium thiosulfate.
Match temperature before restocking fish. Float bags for 15–20 minutes. Add fish in small groups over several hours. Re-establish beneficial bacteria with a pond bacteria treatment after refilling.
Siphoning Method: Physics and Performance
How Siphoning Works
Gravity creates negative pressure that pulls water through the hose once primed. The outlet must be lower than the water surface. Maximum practical lift is about 10 feet at sea level, the atmospheric pressure limit.
How to Build and Prime a Siphon
Use a hose at least 1 inch in diameter for reasonable flow. For larger volumes, Schedule 40 PVC in an inverted U-shape works well. Install a clean-out plug at the highest point for priming.
Fill the hose completely with water using a garden hose or bucket. Cap the lower end, submerge the upper end, then release the cap. Alternatively, use a hand pump or siphon starter.
Critical: Use PVC primer before solvent cement. Primer softens the PVC for bonding. Skipping it can lead to joint failure in large-diameter applications.
Siphon Performance Data
| Hose Diameter | Drop Height | Flow Rate |
|---|---|---|
| 1 inch | 10 ft | 15–20 GPM |
| 1.5 inch | 10 ft | 40–50 GPH |
| 4 inch | 10 ft | ~200 GPM |
| 6 inch | 10 ft | ~500 GPM |
Longer hoses reduce flow due to friction loss. For full drainage, pumps are vastly more efficient than siphons.
Optimizing Drainage Efficiency
Understanding Total Dynamic Head (TDH)
TDH = static head + friction loss + pressure head.
- Static head: The vertical distance from the water surface to the discharge point
- Friction loss: Resistance from hose walls and fittings
- Pressure head: Any backpressure at the discharge end
The key insight: Pump GPH ratings drop as head increases. A pump rated 2,000 GPH at 2 feet of head may drop to 1,000 GPH at 10 feet, a 50% efficiency loss. Higher head means the pump uses the same power while moving less water, wasting electricity and extending drain time.
Pipe Friction Loss Data
| Hose Diameter | Flow Rate (GPH) | Friction Loss per 100 ft (ft of head) | Velocity (ft/sec) |
|---|---|---|---|
| 1 inch | 1,000 | 12.5 | 4.1 |
| 1 inch | 2,000 | 45.0 | 8.2 |
| 1.5 inch | 2,000 | 8.0 | 3.6 |
| 1.5 inch | 4,000 | 28.0 | 7.3 |
| 2 inch | 4,000 | 6.5 | 2.8 |
| 2 inch | 6,000 | 14.0 | 4.2 |
Safe Velocity Limits
- PVC pipe: Maximum 5 ft/sec to prevent water hammer and wear
- Flexible hose: Maximum 8 ft/sec
Exceeding velocity limits reduces pump efficiency and damages equipment. A 1-inch pipe at 15 GPM hits 5.8 ft/sec, exceeding the safe limit, with 12.8 feet of head loss per 100 feet.
Pipe Diameter Recommendations
- Under 50 feet of hose: Match diameter to pump outlet
- 50–100 feet: Step up one pipe size to reduce friction loss
- Over 100 feet: Step up two pipe sizes
Example: A 2,000 GPH pump with 100 feet of hose should use 1.5-inch instead of 1-inch pipe. The larger diameter cuts friction loss dramatically.
Narrow pipe diameter is the most common efficiency killer in pond drainage. A 2-inch pipe at 50 GPM flows at 4.9 ft/sec with minimal friction loss; a 1-inch pipe at the same flow exceeds safe velocity limits.

Water Discharge and Erosion Control
Legal Discharge Options
- Vegetated area: Grass or wooded areas absorb water slowly
- Storm drain: Check local ordinances first
- Dry well or infiltration trench: Good for small ponds
- Irrigation reuse: Gas-powered transfer pumps can move clean water for irrigation
Never discharge directly into streams, wetlands, or drainage ditches without permits.
Best Management Practices (BMPs) for Erosion Control
Install all BMP controls before you start pumping. The sequence matters: settle, diffuse, infiltrate.
- Settling basin: Allows sediment to drop out before water reaches the ground
- Diffuser: A perforated pipe or splash pad that spreads water flow
- Straw bales or silt fences: Catch sediment before it leaves your property
Monitor the discharge area during drainage. If erosion appears, stop and adjust.
Troubleshooting Checklist
Pump Problems
- Pump won't start: Check power, GFCI reset, float switch position
- Air lock: Tilt the pump or bleed air from the discharge hose
- Reduced flow: Check for clogs in the intake screen or impeller
- Pump runs but no water: Verify prime, check for collapsed hose
- Overheating: Shut off immediately, let cool, check for debris blockage
Siphon Problems
- Siphon won't start: Re-prime completely, check for air bubbles
- Siphon stops mid-drain: Air got in the line, restart the prime
- Slow flow: Increase elevation difference or use a larger hose
Environmental Problems
- Muddy water clouding discharge area: Install sediment traps before discharge begins
- Bank slumping while draining: Drainage too fast causes rapid pore-pressure changes. Pause and consult a professional.
- Mosquito breeding: Drain completely rather than leaving puddles

Seasonal & Maintenance Tips
Best time to drain: Late spring or early fall, when temperatures are moderate. This reduces thermal shock to fish and minimizes algae regrowth.
Draining frequency: Full drainage is rarely needed annually. Most ponds benefit from partial water changes of 20–30% instead.
Integrated maintenance cycles: Monthly debris removal and filter cleaning reduce the need for full draining. When you do drain, combine it with scrubbing pond walls and cleaning filters while water is low.
Frequently Asked Questions
Can I drain a pond without a pump?
Yes, for ponds under 1,000 gallons. A manual siphon using a 1-inch hose can move 15–20 GPM with a 10-foot drop. For larger ponds, a pump is vastly more efficient. A 4,600 GPH submersible pump drains a 10,000-gallon pond in about 2.5 hours; a siphon would take weeks.
How do I deal with muddy water during drainage?
Use a settling basin with 15–20 minutes of detention time to let sediment drop out before water reaches the ground. Install silt fences or straw bales at the discharge point. For the pond itself, keep the pump intake 6–12 inches above the bottom to reduce sediment pickup.
How long does it take to drain a pond?
Divide your pond's gallons by your pump's GPH, then add 20–30% for real-world head loss. A 5,000-gallon pond with a 2,000 GPH pump takes about 2.5–3 hours. A 10,000-gallon pond with a 4,600 GPH pump takes 2.5–3 hours. Gas trash pumps move 150–300 GPM, draining large ponds in hours.
Do I need a permit to drain my pond?
Often yes. Land disturbance of 1 acre or more typically requires a permit and SWPPP. Discharging onto adjacent property requires written consent. Check with your local conservation district or county planning office before starting. Coastal areas may have additional permit requirements.
What do I do with the sludge at the bottom?
Pond sludge is decomposed organic matter and is nutrient-rich. Reuse it as garden compost if no chemical treatments were used, or spread it on the lawn as top dressing. For large volumes, let it dewater for 2–4 weeks before removal. Landfill disposal is an option if local regulations allow.