
How to Make a Pond Hold Water
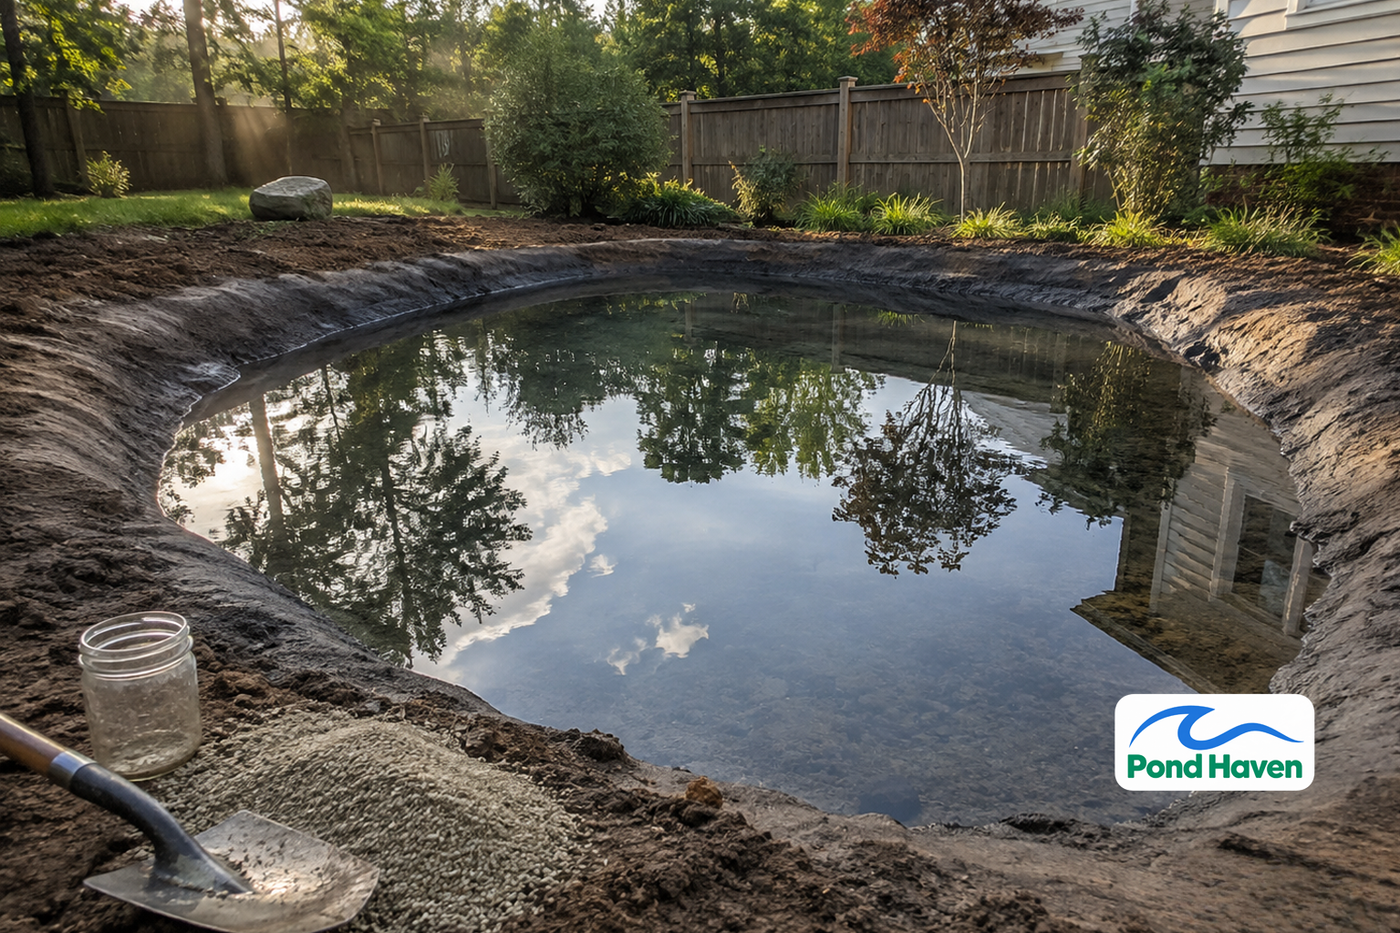

A pond that won't hold water is one of the most frustrating problems a property owner can face. You dig it, fill it, and within days the level drops. Most of the time, that's not evaporation. It's seepage: water migrating through porous soil, cracks, or old root channels faster than your pond can retain it.
The good news is you don't need a synthetic liner to fix it. Natural sealing methods, using clay, biological processes, and mechanical compaction, can create a durable, watertight barrier that's safe for fish, livestock, and the environment. Sodium bentonite clay, the most common natural sealant, typically slows seepage within 10 to 14 days and forms a full seal within 30 to 60 days.
This guide walks you through the entire process: diagnosing why your pond leaks, testing your soil, choosing the right sealing method, applying it correctly, and protecting the seal for the long term.
- Test your soil before choosing a sealing method. The Mason Jar Test tells you your sand, silt, and clay percentages, which determines what will work.
- Sodium bentonite is the most versatile natural sealant, expanding 10 to 15 times its dry volume when wet to fill soil pores.
- Application rates range from 0.5 lbs/sq ft for heavy clay to 12+ lbs/sq ft for pure sand. Match the rate to your soil test results.
- The gleying method uses manure and organic matter to create an anaerobic biological seal, reducing soil permeability by a factor of at least 10.
- Mechanical compaction with a sheepsfoot roller works only on soils with at least 10% clay content. Sandy soils need an imported barrier.
Why Ponds Leak: The Science of Soil and Water Loss
Soil Texture Determines Water Retention
Soil is made of three particle sizes, and their proportions determine how well your pond holds water:
- Sand: 0.05 to 2.0 mm in diameter. Large particles with big pore spaces. Water drains through quickly.
- Silt: 0.002 to 0.05 mm. Intermediate size. Holds water better than sand but still allows drainage.
- Clay: Less than 0.002 mm. Microscopic flat particles that pack tightly. Clay soil can hold up to 35% water at field capacity.
Sandy soils drain fast because water flows freely between the large particles. Clay soils hold water because the tiny particles pack together, leaving almost no room for water to move. For a pond to hold water naturally, your soil needs enough clay to form that barrier.
Common Causes of Pond Seepage
Beyond soil texture, several other factors can cause a pond to leak:
- Highly porous soils: Sand, gravel, and fractured bedrock allow water to percolate downward or laterally.
- Poor compaction during construction: Soil not compacted at the right moisture content stays loose and permeable.
- Desiccation cracking: When a pond sits empty, clay seals dry out and crack, creating pathways for water.
- Root penetration: Decaying roots leave voids that become preferential flow paths for water.
- Burrowing animals: Muskrats, groundhogs, and crayfish can breach both natural and installed seals.
- Organic matter decomposition: As buried organic material rots, it leaves voids behind.
Step 1: Test Your Soil Before You Do Anything
You cannot choose the right sealing method without knowing your soil texture. Four field tests give you the information you need. Start with the Mason Jar Test, which is the most precise.
The Mason Jar Test (Soil Texture Analysis)
This test separates your soil into its sand, silt, and clay fractions so you can calculate exact percentages.
What you need:
- A clear, straight-sided glass jar (a quart jar works well)
- A kitchen strainer or mesh sieve (2 mm screen)
- Dish soap or Borax (as a dispersant)
- Water
Procedure:
- Collect soil samples from the pond basin, not the banks. Take samples from several spots at least 6 inches deep.
- Air-dry the soil and remove roots, rocks, and debris.
- Push the soil through a 2 mm sieve. This step is crucial. Unsieved soil forms solid balls of clay that skew your results.
- Fill the jar one-third full with sieved soil.
- Add water until the jar is two-thirds full.
- Add 1 teaspoon of dish soap or Borax. This dispersant keeps clay particles from clumping together.
- Shake vigorously for 2 to 3 minutes.
- Let it settle. Mark the jar at each layer boundary:
- Sand: settles in 1 minute
- Silt: settles in 2 to 6 hours
- Clay: settles in 24 to 72 hours
Calculating your percentages:
- % Sand = (height of sand layer ÷ total soil height) × 100
- % Silt = (height of silt layer minus sand layer ÷ total soil height) × 100
- % Clay = 100% − (% sand + % silt)
Example: Total soil height of 68 mm, sand layer at 43 mm, silt layer ending at 63 mm. Sand = 43/68 = 63%. Silt = (63−43)/68 = 29%. Clay = 100 − 63 − 29 = 8%. That's a sandy soil that will need a substantial sealing effort.
Plot your percentages on the USDA Soil Texture Triangle to classify your soil type.
The Ribbon Method (Quick Field Check)
Moisten a small ball of soil and squeeze it between your thumb and forefinger, pushing it out into a ribbon.
- Clay: forms a long, flexible ribbon 2 inches or longer before it breaks
- Silt: forms a short, crumbly ribbon
- Sand: won't ribbon at all, just crumbles
This is a quick check you can do on site, but it's not a substitute for the jar test.
The Bucket Test (Percolation Check)
This test tells you how fast water moves through your soil and helps you estimate the bentonite rate you'll need.
- Drill 15 holes (1/4 to 3/8 inch) in the bottom of a 5-gallon bucket.
- Place 1 to 2 inches of gravel in the bottom.
- Add 6 to 8 inches of soil from your pond bottom.
- Mix in bentonite at your anticipated application rate.
- Add 3 cups of water and tamp firmly.
- Mark a fill line 2 inches from the top and monitor water loss for 48 hours.
If the test soil holds water, multiply that successful rate by 1.25 to 1.75 to account for the greater water pressure and distribution challenges in a full-scale pond. For large projects, add a 25% to 50% safety margin on top of that.
The Pipe Test (Subsurface Drainage Check)
Drive a 12-inch diameter smooth-wall pipe 8 inches into the soil. Add a soil-bentonite mix, compact it, and fill with 18 inches of water. Measure the water level decline over time. A fast drop indicates deep drainage through porous layers that will need a barrier.
This free online tool maps soil types across the U.S. Check your property's soil classification before excavation so you know what you're dealing with before you break ground.

Natural Sealing Methods That Work
Sodium Bentonite Clay
What It Is and How It Works
Sodium bentonite is a natural clay mineral composed primarily of montmorillonite, formed from weathered volcanic ash. The highest-purity sodium bentonite in the U.S. is mined in Wyoming.
When wet, sodium bentonite expands to 10 to 15 times its dry volume. The expanding platelets fill soil pores, cracks, and microscopic voids, creating a nearly impermeable barrier. The target permeability for a pond liner is less than 1 × 10⁻⁶ cm/sec, a common standard for compacted clay liners.
Bentonite is non-toxic and safe for fish, livestock, and the environment. It has a neutral pH of about 8 to 9 when hydrated.
Three Application Methods
Blanket Method
- Over-excavate the pond bottom by 4 to 8 inches.
- Fill deep holes and crevices with a 1:5 bentonite-to-soil mixture.
- Spread a 2 to 4 inch layer of bentonite evenly over the bottom. Use a 10-foot × 10-foot grid to ensure even coverage.
- Replace the removed soil (4 to 6 inches) carefully to avoid disturbing the bentonite.
- Compact with a sheepsfoot roller.
This is the most effective method for leaking ponds, but it requires draining. Side slopes must be 3:1 or flatter to prevent the saturated, gel-like bentonite from slumping.
Mixed Method
- Disk or till the pond bottom to make the top 4 to 6 inches uniform.
- Spread bentonite and mix it into the top 4 to 10 inches of soil using a disc harrow or rototiller.
- Compact with a drum roller or tracked vehicle, making 3 to 4 passes.
This is the most common method for existing ponds. It works on slopes up to 45 degrees (1:1 ratio). Compaction after mixing is mandatory.
Sprinkle Method
Spread coarse granular bentonite over the water surface and let it sink. The granules are drawn into porous areas by the flow of leaking water, where they swell and plug the leak.
This method requires 2 to 3 times more material than the mixed method and is less reliable. Use it only for minor seepage or spot repairs in ponds that can't be drained. Don't use fine powder; it stays in suspension and clouds the water. Use coarse granules or chips.
Application Rates by Soil Type
| Soil Type | Application Rate (lbs/sq ft) | Recommended Method |
|---|---|---|
| Heavy clay | 1 - 2 | Mixed |
| Clay loam | 1.0 - 1.5 | Mixed |
| Silt loam | 1.5 - 2.0 | Mixed |
| Sandy loam | 2.0 - 4.0 | Mixed or Blanket |
| Sandy soil | 4.0 - 8.0 | Mixed or Blanket |
| Sand and gravel | 6.0 - 12.0 | Blanket |
| Gravel / fractured bedrock | 6.0 - 8.0 | Blanket |
| Pure sand | 12.0+ | Blanket (may need flocculant polymers) |
For water depths over 8 feet, add 1 lb/sq ft for every additional 8 feet of depth.
Cost note: Bentonite runs roughly $300 to $600 per ton plus shipping. A 1/4-acre pond at 1 lb/sq ft needs about 2,700 lbs (1.35 tons), so material costs run $400 to $800 plus shipping. For irregular ponds, calculate area using the ellipse formula: Length × Width × 0.785.
The Gleying Method (Biological Sealing)
What Is Gleying?
Gleying is a biological sealing process that uses anaerobic fermentation to create an impervious layer. When organic matter decomposes without oxygen, it produces a blue-gray, sticky layer called gley. This layer has permeability comparable to compacted clay.
Adding manure to an earthen structure can significantly reduce permeability. This happens through three simultaneous processes: physical clogging of soil pores by solid particles, chemical interactions between manure constituents and soil, and biological activity that blocks pores.
Step-by-Step Gleying Process
- Drain the pond completely and let the bottom dry.
- Clear all vegetation, rocks, and sticks from the pond bottom.
- Fill any cracks with compacted impervious soil.
- Spread a 4-inch (10 cm) layer of moist animal manure over the bottom. Pig dung is preferred, but well-rotted cow or horse manure works.
- Add a 2 to 4 inch layer of vegetal material: grass, leaves, rice straw, or soaked cardboard.
- Cover with a final 4-inch (10 cm) layer of soil.
- Compact the layers thoroughly.
- Wait 2 to 3 weeks for fermentation to establish.
- Refill the pond slowly with water.
- Wait 4 to 8 weeks for the anaerobic bacteria to fully establish the seal before stocking fish.
Cattle manure alternative: Spread at least 2 cubic meters of cattle manure per 100 square meters of pond bottom. Repeat every 8 to 12 months until seepage is tolerable. This works for soils with less than 50% sand.
Mechanical Compaction and Clay Blankets
Mechanical Compaction
Compaction densifies soil, reducing pore space and restricting water flow. It only works on soils with a wide range of particle sizes and at least 10% clay content. Pure sand won't compact into a barrier.
Equipment: A sheepsfoot roller (also called a pad-foot roller) is the preferred tool. Rent one for $200 to $400 per day from equipment rental yards. Heavy tractor tires or crawler tractors are secondary options.
Procedure:
- Scarify or loosen soil to a depth of 8 to 10 inches using a disk or rototiller.
- Apply water to achieve optimum moisture content, typically around 13% for most soils. The soil should retain its shape when compressed but not be sticky.
- Compact in layers (lifts). Loose material should be applied in 9-inch layers and compacted down to 5 to 6 inches. A common standard is a maximum compacted thickness of 6 inches per layer.
- Make 4 to 6 passes with the roller.
- Check for "roller walk-out": when the roller no longer sinks into the soil, you've reached maximum density.
Thickness requirements by water depth:
- Up to 10 feet of water: at least 8 inches of compacted soil
- Over 10 feet: increase proportionally. A 16-foot-deep pond needs about 12 inches of compaction, placed in multiple 6-inch lifts.
Clay Blankets
For soils with less than 10% clay, you may need to import clay and install it as a blanket liner.
Specifications:
- Material should contain approximately 20% clay particles by weight, with the remainder being a mix of small gravel to silt.
- Minimum thickness: 12 inches for water depths up to 10 feet.
- Increase thickness by 2 inches for every 1 foot of water depth above 10 feet.
- Place in 6-inch lifts with moisture control.
- Target permeability: less than 1 × 10⁻⁶ cm/sec.
- Cover the clay blanket with 12 to 18 inches of soil or gravel to prevent cracking from drying or freeze-thaw cycles.
Puddling (Traditional Method)
Puddling is an old agricultural technique that breaks down soil structure to create a seal. It's the same process used in rice farming.
- Saturate the pond bottom and let water soak in.
- Work the soil while it's submerged under a shallow layer of water using a hoe, plow, or rotary puddler.
- The working action forces fine clay particles into pore spaces.
- Repeat 2 to 3 times over several weeks.
Puddling works best on soils with at least 10% clay content and a wide range of particle sizes. It's low cost but labor-intensive, and it's impractical for ponds larger than 1/4 acre.
How To Choose the Right Method for Your Pond
Your soil test results drive the decision. Here's the framework:
| Soil Test Result | Recommended Method | Why |
|---|---|---|
| More than 30% clay | Mechanical compaction or puddling | Native clay can seal if properly compacted |
| 15-30% clay | Sodium bentonite (mixed method) | Bentonite supplements existing clay |
| Less than 15% clay (sandy) | Sodium bentonite (blanket method) or clay blanket | Need an imported barrier layer |
| High organic matter | Gleying method | Organic seal works with existing conditions |
| Rocky or fractured bedrock | Clay blanket or bentonite blanket | Need a continuous barrier over irregular surface |
Other factors to consider:
- Can you drain the pond completely? Required for gleying and the blanket method.
- Budget: Bentonite costs more upfront; compaction costs more in equipment rental.
- Timeline: Bentonite seals in 30 to 60 days; gleying takes 4 to 8 weeks; compaction is immediate.
- Pond size: Puddling is impractical for ponds larger than 1/4 acre.
Advantages of Natural Sealing
- Safe for fish, livestock, and the environment
- No synthetic materials to degrade or puncture
- Self-healing: bentonite particles migrate to new cracks and plug them
- Lower long-term cost than liner replacement
Disadvantages
- Requires draining the pond for most methods
- Seal takes 30 to 90 days to fully develop
- Vulnerable to damage from livestock, roots, and desiccation
- May not work on soils with very low clay content without importing material

Expert Standards and Safe Design
Key NRCS Engineering Codes
The USDA-NRCS publishes conservation practice standards that define proper pond construction and sealing:
- NRCS Code 378 (Pond): Defines a pond as a water impoundment made by constructing an embankment, excavating a dugout, or a combination. Applies to embankment ponds with effective height of 35 feet or less. Requires a foundation cutoff of impervious material at least 2 feet deep.
- NRCS Code 520 (Compacted Soil Treatment): Specifies standards for creating an impermeable soil barrier, including requirements for soil plasticity and fines content.
- NRCS Code 521D (Compacted Clay): Sets a unit seepage rate of 1.0 × 10⁻⁶ cm/sec (0.0028 ft/day) and requires placement in lifts with a maximum compacted thickness of 6 inches per layer.
Site Selection and Design Considerations
- Avoid building ponds in areas with shallow bedrock or high water tables.
- Slope pond banks at 3:1 or flatter to prevent erosion and slumping.
- Include a deep pocket of 8 to 12 feet to maintain water during drought and keep fish cool in summer.
- Keep the pond bottom at least 2 feet above the seasonal high water table.
- Clear all trees and roots from the pond footprint before construction.
- Check setback requirements with your local permitting authority, as distances from wells and water supplies vary by location.
Long-Term Maintenance and Protection
Your natural seal is durable but not indestructible. Protect it with these practices.
Protecting Your Natural Seal
- Fence livestock out of the pond. Hoof action destroys clay seals. If livestock must have access, use a gravel cover over the seal.
- Maintain a 10 to 15 foot buffer of grass or vegetation around the pond to filter runoff and stabilize banks.
- Control muskrats and burrowing animals with trapping or exclusion. Zero signs of burrowing should be present in or around berms and sidewalls.
- Remove encroaching tree roots annually. Woody roots can exploit cracks in compacted clay.
- Prevent erosion with riprap or vegetation on banks. Use rock riprap at water inflow points to prevent concentrated flow from washing away the seal.
- Keep the pond full through winter in freezing climates. An empty pond allows the clay seal to dry out and crack.
Spot Repair Tips
- Small leaks: Sprinkle granular bentonite over the suspected area at a rate of about 1 to 2 lbs/sq ft. The granules sink, find the hole, and form an impermeable bond.
- Cracks from drying: Fill with a bentonite slurry and compact.
- Animal burrows: Collapse and fill with compacted clay.
- Monitor water levels monthly: A drop of more than 1 to 2 inches per week, excluding evaporation, indicates a problem.
Seasonal Considerations
- Refill ponds slowly in spring to avoid disturbing the seal. Use a gentle water flow to prevent erosion of bentonite or clay layers.
- If the pond must be drained, do it in late fall and refill in early spring. This minimizes the time the seal is exposed to drying.
- In freezing climates, keep the pond full through winter. Desiccation cracking is a bigger threat than ice damage.

Frequently Asked Questions
How long does sodium bentonite take to seal a pond?
Bentonite begins swelling immediately and typically slows seepage within 10 to 14 days. A full seal usually develops within 30 to 60 days. In cold weather, allow up to 90 days for complete sealing.
Can I seal a pond without draining it?
Yes, using the sprinkle method. Spread coarse granular bentonite over the water surface and let it sink into porous areas. This requires 2 to 3 times more material than the mixed method and is less reliable. Draining the pond and using the mixed or blanket method gives far better results.
How much does it cost to seal a pond naturally?
Bentonite costs roughly $300 to $600 per ton plus shipping. A 1/4-acre pond at an application rate of 1 to 2 lbs/sq ft needs about 2,700 to 5,400 lbs (1.35 to 2.7 tons), so material costs can range from several hundred to over a thousand dollars plus shipping. Equipment rental for compaction adds $200 to $400 per day.
Will manure in my pond hurt fish?
No, if applied correctly. The gleying method uses well-rotted manure tilled into the soil before refilling. The anaerobic decomposition consumes oxygen in the soil layer, not the water column. Wait 4 to 8 weeks before stocking fish.
What is the best natural seal for a sandy-bottom pond?
A clay blanket or the bentonite blanket method. Sandy soils lack the fines needed for compaction or puddling to work. You need an imported barrier layer of at least 12 inches of compacted clay or a 2 to 4 inch bentonite layer, covered with native soil.
The Bottom Line
Sealing a pond naturally comes down to five steps: test your soil, diagnose the leak source, choose the right method based on soil texture, apply it correctly, and protect the seal long-term.
Start with the Mason Jar Test to learn your soil's sand, silt, and clay percentages. Then match the method to the result. High-clay soils respond to compaction. Sandy soils need bentonite or an imported clay blanket. Highly permeable soils with organic matter respond to gleying.
Natural sealing takes time, usually 30 to 90 days for the seal to fully develop. But the result is a durable, self-healing barrier that's safe for your fish, your livestock, and your property. And it costs a fraction of what you'd spend on a synthetic liner.