
How to Build a Duck Pond
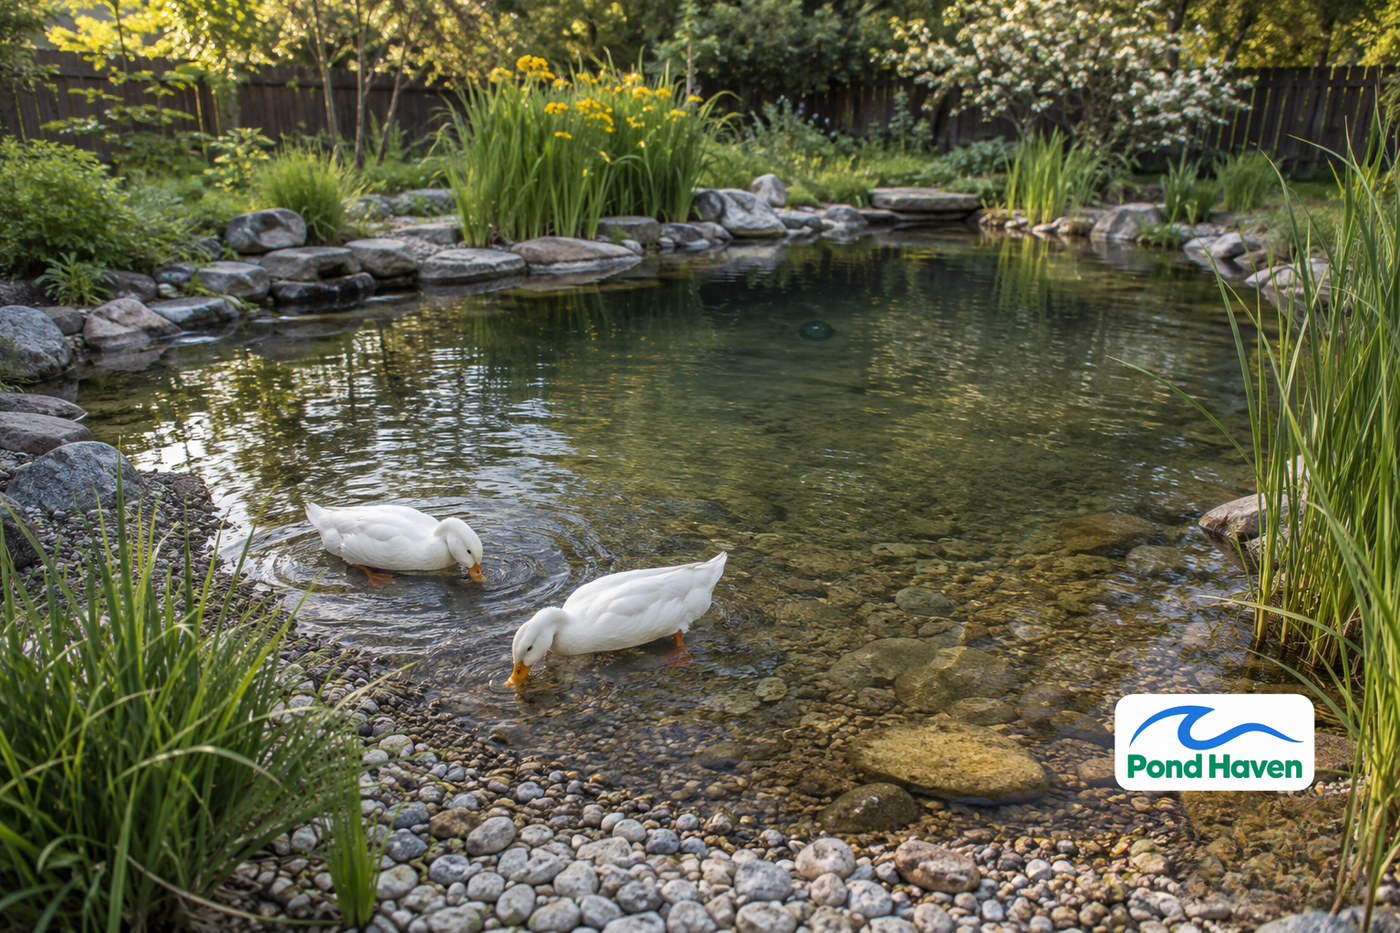

Ducks need water. It is not a luxury. They use it to preen, cool off, mate, and keep their eyes and nostrils clean. A pond is the single best thing you can build for a backyard flock.
But ducks are messy. One adult duck produces roughly 0.5 to 1 pound of manure per day. Four ducks equal 2 to 4 pounds of waste daily, which is a far heavier biological load than the same number of fish. Build the pond wrong and you will fight green water, foul odors, and sick birds all summer.
This guide covers the three things that matter most: sizing the pond correctly, choosing the right liner, and building a filtration system that actually handles duck waste. You will get specific numbers for depth, pipe sizes, pump turnover rates, and maintenance schedules.
- Keep the pond 6 to 24 inches deep. Ducks are dabblers, not divers, and deeper water adds cost without benefit.
- Use pond-grade EPDM (45-mil) or RPE liner only. Roofing-grade EPDM contains mildewcides toxic to waterfowl.
- Double your filtration capacity. Duck waste is roughly 20 to 40 times the load of the same number of fish.
- Plan for 10 to 20 square feet of water surface per duck, with a minimum of 50 to 100 square feet for 2 to 4 ducks.
- Install a bog filter and a 4-inch bottom drain. These two components do the heavy lifting on waste removal.
Why Ducks Need a Pond
Ducks do not sweat. They rely on water to regulate body temperature in summer heat and to keep their feathers insulated in winter. Water also triggers the uropygial gland, located at the base of the tail. When a duck submerges its head, the gland releases oil that the duck spreads across its feathers for waterproofing. Without enough water depth to dunk their heads, feathers become waterlogged and ducks lose insulation.
Water is also essential for mating. Most domestic duck breeds court and breed on water, and females need it for safe copulation. A pond keeps their eyes, nares (nostrils), and bills clean, reducing the risk of respiratory and eye infections.
The depth requirement is simple: ducks need at least 8 inches of water to submerge their heads and activate the preen gland. That is the biological minimum. Everything above that is about your management style and the size of your flock.
Phase 1: Planning and Design
How Do You Choose the Best Site for a Duck Pond?
Pick the site before you buy any materials. Four factors matter most.
Sunlight. The pond needs 4 to 6 hours of direct sun daily. Sunlight keeps aquatic plants healthy and helps control algae. In USDA zones 8 and warmer, choose a spot with afternoon shade so the water does not overheat in summer.
Runoff. Do not build in a low spot where rainwater flows in. Runoff carries soil, grass clippings, and lawn chemicals that cause sludge buildup and algae blooms. If the only available site sits below a slope, dig a shallow diversion ditch to channel rainwater around the pond.
Setbacks. Keep the pond at least 50 feet from septic drain fields and well heads. Call 811 before you dig to locate buried utility lines. Check your local groundwater depth; a high water table complicates excavation and can float an empty liner.
Trees. Avoid heavy leaf litter that clogs filters. Some tree roots, especially willows and poplars, actively seek water and can puncture liners over time.
What Size and Depth Should a Duck Pond Be?
This is where most guides get it wrong. Many sources recommend 6 to 12 feet deep, borrowed from koi pond standards. Ducks do not need that. They are dabbling birds that feed and forage in shallow water.
Depth: 6 to 24 inches is the sweet spot.
- 8 inches minimum for head submersion and preening
- 6 to 12 inches works for most domestic breeds (Pekin, Khaki Campbell, Indian Runner)
- 18 to 24 inches suits geese and larger duck breeds
- 24 inches maximum for domestic ducks; deeper adds cost and risk
The 2-foot maximum lets ducks stand, preen, and mate naturally. It also keeps ducklings safe. Ducklings under 3 to 4 weeks old lack preen oil, can become waterlogged, and can drown in deep water. A shallow pond with a gradual beach entry solves that problem entirely.
If you keep diving breeds like Ruddy Ducks or Canvasbacks, add a 3 to 4 foot deep section. Most backyard flocks never need this.
Surface area: 10 to 20 square feet per duck.
A 4-foot kiddie pool works for 2 to 4 ducks as a temporary setup, but a permanent pond needs more room. Plan for:
- 50 to 100 square feet minimum for 2 to 4 ducks
- 200 square feet recommended for a functional permanent pond
- 300+ square feet preferred for larger flocks and better water quality
Larger is easier to maintain. More water volume dilutes waste and stabilizes temperature swings.
Shape. Build the pond longer than it is wide. Irregular shapes create more edge habitat and natural filtration zones. Include a shallow beach entry that slopes gradually to 2 to 3 inches deep so ducks can walk in and out safely. Steep sides on one portion discourage predators from wading in.
Volume calculation. Length x width x average depth = cubic feet. Multiply by 7.48 for gallons.
Example: a 10 ft x 8 ft pond at 1.5 ft average depth = 120 cubic feet = 898 gallons.
What Water Source Should You Use?
Municipal water is treated and safe, but chlorine and chloramine must be neutralized. Chlorine dissipates if you let water sit 24 to 48 hours. Chloramine does not; you need a chemical dechlorinator.
Well water is usually clean but may be high in iron, manganese, or hardness. Test before filling. Iron bacteria can clog filters and stain liners.
Rainwater collection is an excellent free source. Divert roof runoff into the pond through a settling basin or pre-filter to remove debris. Rainwater harvesting barrels connected to a refill system keep water bills low while maintaining fresh levels for the flock.
Natural springs or streams are ideal but rare. They require careful management of flow rate and sediment. Check local regulations before diverting any natural water source.

Phase 2: Choosing the Right Liner
EPDM vs. RPE: Which Liner Should You Use?
Two liner types dominate permanent duck pond builds: EPDM rubber and RPE (reinforced polyethylene). Both work. They differ in puncture resistance, weight, and installation ease.
| Feature | EPDM (45-mil) | RPE (20-30 mil) |
|---|---|---|
| Puncture resistance | Moderate; requires underlayment | Higher than EPDM at comparable weight |
| Flexibility | Excellent; conforms to complex shapes | Good; less stretchy, prone to creasing |
| UV resistance | Good | Excellent |
| Lifespan | 20-30 years | 20+ years |
| Weight (20x16 ft sheet) | ~200 lbs | 60-80 lbs |
| Repair | Easy with seam tape and primer | Requires specialized tape |
| Best for | Complex shapes, DIY installs | Rocky soil, root-prone areas, solo installs |
EPDM pros: Highly flexible, fish-safe, UV resistant, and folds around 90-degree corners and shelves. It is the gold standard for irregular pond shapes.
EPDM cons: Heavy and difficult for one person to install. A ballpoint pen can puncture it with minimal force, so underlayment is mandatory. It stiffens in cold weather.
RPE pros: Lightweight enough for solo installation. Superior puncture resistance means it can often be installed without underlayment. Available in very large single sheets, eliminating on-site seaming.
RPE cons: Less flexible than EPDM and prone to creasing during installation.
What Underlayment Do You Need?
Underlayment protects the liner from punctures by rocks, roots, and sharp soil. It is not optional with EPDM. Skipping it is the number one cause of premature liner failure.
- Commercial geotextile underlayment is the best option. Use 8 to 16 oz per square yard. Extend it 1 foot beyond the pond edge and overlap seams by at least 6 inches.
- Old carpet works as a budget option but degrades over time and can harbor bacteria.
- Washed sand (2 to 3 inches) helps but is less effective than geotextile.
Lay underlayment over the entire excavated area, including sidewalls and the bottom.
Liner Sizing Formula
Use this formula to calculate liner size:
Liner Length = Pond Length + (2 x Maximum Depth) + 2 feet Liner Width = Pond Width + (2 x Maximum Depth) + 2 feet
Example: a 10 ft x 8 ft pond at 2 ft deep needs a liner at least 16 ft x 14 ft.
The extra 2 feet on each side provides overlap for anchoring the edges.
Phase 3: Excavation and Liner Installation
How Do You Excavate the Pond?
Mark the outline. Use spray paint or a garden hose to outline the pond shape, including the beach entry and any planting shelves.
Dig in layers. Remove the top 6 to 8 inches of topsoil first and set it aside for landscaping. Excavate to final depth, creating shelves at 6-inch intervals for marginal plants. Slope the beach entry at 10 to 15 degrees for easy duck access.
Prepare the base. Remove all rocks, roots, and debris from the hole. Tamp the soil to create a smooth, firm base. Add a layer of washed sand over the smoothed soil for extra liner protection.
Install underlayment. Drape it over the entire hole, smoothing wrinkles. Overlap seams by at least 12 inches.
Install the liner. Position it loosely; do not stretch tight. Begin filling with water slowly, smoothing wrinkles as the liner settles. Use sandbags or rocks to hold edges in place during filling.
Secure the edges. Fold the liner over the top edge and bury it in a 4 to 6 inch trench around the perimeter. Backfill with soil and compact. This anchors the liner and prevents ducks from getting underneath it.
Raise the rim. Build the rim of the hole approximately 3 inches above the surrounding soil to prevent runoff inflow. Raise it higher in low-lying areas. Hide liner edges with rocks, flagstone, or bricks around the circumference.
Phase 4: The Critical Filtration System
What Is the "Double Filtration" Rule for Ducks?
Here is the math that most guides skip. Ducks produce a surprisingly large amount of waste, far more than an equivalent number of fish.
The rule: whatever filtration you would install for a fish pond of the same size, double it for ducks.
Under-filtering leads to ammonia spikes, algae blooms, foul odors, sick ducks, and mosquito infestations. The good news is that a properly designed system handles the load without constant babysitting.
What Mechanical Filtration Do You Need?
Skimmers. Skimmers remove surface debris (feathers, leaves, food) before it sinks and decomposes. Match the skimmer flow rate to your pump output. A 3,000 GPH pump needs a skimmer rated for 3,000+ GPH. Install it on the downwind side of the pond for maximum debris capture.
Bottom drains. This is the most important mechanical component for a duck pond.
- Use 4-inch drains. Two-inch drains clog too easily with duck waste.
- Each 4-inch drain covers a 6 to 8 foot radius (a 12 to 16 foot diameter circle).
- Install drains at the lowest point(s) of the pond.
- Slope the pipe at least 1/8 inch per foot to prevent settling and clogs.
- Keep pipe runs under 15 feet where possible. If a run exceeds 25 feet, oversize the pipe.
Aerated drains are strongly recommended. They pull waste into the drain while adding oxygen. The aeration creates a vortex that draws neutrally buoyant solids, including animal waste, directly into the suction. This is the single biggest upgrade you can make to a duck pond filtration system.
Settlement chamber or vortex filter. This removes heavy solids before water reaches the biological filter, reducing maintenance frequency on downstream components.
How Do You Build a Bog or Wetland Filter?
Bog filters are the modern standard for duck ponds. They handle high waste loads without the constant cleaning required by pressurized filters, and they double as a planted garden area.
Size. The bog should be 10 to 20% of the pond's surface area. A 100 square foot pond needs a 10 to 20 square foot bog.
Depth. 12 to 18 inches.
Liner. Use the same pond-grade liner as the main pond.
Gravel. Use 3/4-inch washed pea gravel or river rock, 8 to 12 inches deep. Wash all gravel completely before installation. Traces of soil, sand, or silt will clog the system.
Distribution pipe. Run 2-inch perforated PVC the length of the bog, buried in the gravel.
How it works. The pump pushes water through the distribution pipe. Water rises through the gravel, where beneficial bacteria break down ammonia and nitrites. Plants absorb nitrates and phosphorus. Clean water spills back into the pond via a weir or waterfall.
Plant selection. Choose heavy-feeding aquatic plants:
- Cattails (Typha latifolia)
- Pickerelweed (Pontederia cordata)
- Water iris (Iris versicolor)
- Arrowhead (Sagittaria latifolia)
- Watercress (Nasturtium officinale) — bonus: edible for ducks
What Pump and Plumbing Specs Do You Need?
Pump sizing. The entire pond volume should pass through the filter at least once every 2 hours.
Formula: pond gallons / 2 = minimum GPH pump rating.
- 900-gallon pond: 450 GPH minimum
- 1,500-gallon pond: 750 GPH minimum
For duck ponds, aim for 125% of the minimum turnover to handle the extra waste. A 900-gallon duck pond should run a pump rated at roughly 560 GPH or higher.
Run two pumps. A minimum of two pumps operating simultaneously ensures reliability. If one fails, the system keeps working.
Pipe slope. Maintain a minimum slope of 1/8 inch per foot on all gravity-fed lines.
Pump type. For high-waste applications, choose a vortex pump with a recessed impeller. It is highly resistant to clogging from fibrous materials. Grinder pumps, which shred waste before it enters the impeller, work well for high-head applications and smaller-diameter pipes.
Phase 5: Duck-Specific Features and Safety
Safe Entry and Exit
Ducks need a gradual slope or "beach entry" to walk in and out of the water. Steep sides cause leg injuries and trap ducklings. Build the beach entry at a 10 to 15 degree slope down to 2 to 3 inches of water.
For stock tanks or raised ponds, provide wide boards, concrete block stairways, or flat rock ramps. These prevent leg injuries when ducks exit tall containers.
Duckling Safety
Ducklings under 3 to 4 weeks old lack preen oil and can become waterlogged and drown. Keep them in shallow water only. A shallow dish or a separated shallow section of the pond works until they are fully feathered. Never leave ducklings unsupervised near deep water.
Predator Proofing
Minks, foxes, raccoons, and hawks all target ducks. Fencing is the primary defense.
Bury hardware cloth 12 inches deep in an "L" shape around the pond perimeter. The L-shape extends outward at the bottom, deterring digging predators. Use 1/2-inch or smaller mesh. Extend the fence at least 4 feet above ground.

Ongoing Maintenance
Cleaning Schedule
| Task | Frequency |
|---|---|
| Partial water change (10-20%) | Weekly |
| Skimmer basket emptying | Every 2-3 days |
| Bog filter deep cleaning | Yearly |
| Full water change (unfiltered ponds) | Every 1-2 days |
| Full water change (bog-filtered ponds) | Every 2 weeks |
| Gravel filter cleaning | Yearly |
Seasonal Care
Spring. Clean the bog filter and check all plumbing. Inspect the liner for damage from winter ice. Top up water levels.
Summer. Monitor algae growth. Duck waste is high in nitrogen and phosphorus, which fuels algae. Maintain the 125% pump turnover rate and keep the bog filter plants growing vigorously; healthy plants outcompete algae for nutrients.
Fall. Remove leaves daily. Leaf litter decomposes and adds to the waste load. Trim back bog plants.
Winter. Install a de-icer to maintain an open hole in the ice. This is critical for gas exchange. Toxic gases from decomposing organic matter build up under ice and can kill waterfowl.
De-icer sizing by pond volume:
- 50 gallons: 150 watts
- 100 to 300 gallons: 500 to 1,500 watts depending on climate
- 300 to 1,000 gallons: scale up wattage significantly
De-icers are available from 100 to 1,250 watts in floating or submersible models.
Use the Nutrient-Rich Water
Duck waste is nitrogen-rich and acts as free fertilizer. Drain the weekly 10 to 20% water exchange directly into garden beds or fruit trees. Modern DIY setups include gravity-fed drainage systems or sump pumps that route "dirty" pond water to the garden. This is circular homesteading at its best: the pond cleans the water, the plants clean the nutrients, and your garden gets free fertilizer.
Budget Breakdown
| Tier | Cost | What You Get |
|---|---|---|
| Economy | $15-$60 | Kiddie pool or preformed shell; requires daily dumping |
| Mid-range | $40-$120 | Galvanized or Rubbermaid stock tank; water changes every 2-3 days |
| DIY in-ground | $150-$400 | EPDM liner pond without complex filtration |
| Full professional | $500+ | Lined, bog-filtered pond with permanent drainage plumbing |
Common Mistakes to Avoid
- Dead zones. Placing drains more than 8 feet from corners or alcoves leaves waste to decompose in stagnant water.
- Undersized pipes. Using 3-inch pipe instead of 4-inch significantly reduces flow capacity. The cost difference is less than $1 per foot.
- Wrong liner grade. Roofing-grade EPDM contains toxic mildewcides. Use pond-grade only.
- No underlayment with EPDM. EPDM punctures easily. Underlayment is mandatory.
- Flat floors. A flat pond floor prevents debris from reaching the drain. Slope the floor 1 inch per foot toward the drain.
- Treating irregular shapes as one zone. Each lobe of an L-shaped pond needs its own drain.

A Note on Permits
Check local regulations before you dig. Many small ponds are exempt from permits, but the thresholds vary.
Some states, for example, do not require a dam safety permit for very small structures. Other states have different rules. A wetlands permit is required if the pond is within a regulated wetland area. Section 401 and 404 permits apply to ponds on perennial streams or jurisdictional wetlands.
Call your local environmental health department before breaking ground.
Frequently Asked Questions
How deep should a duck pond be?
Keep it 6 to 24 inches deep for domestic ducks. Eight inches is the minimum for head submersion and preening. Two feet is the practical maximum; deeper water adds cost and risk without benefit for dabbling breeds.
How big should a duck pond be for 4 ducks?
Plan for 10 to 20 square feet of water surface per duck. Four ducks need 50 to 100 square feet minimum, with 200 square feet recommended for a functional permanent pond.
Do ducks need a pump and filter?
Yes. Ducks produce a significant amount of manure daily. Without filtration, ammonia spikes, algae blooms, and foul odors follow quickly. Use a much larger filtration capacity than you would for a fish pond of the same size.
Can I use a kiddie pool instead of building a pond?
A 4-foot kiddie pool works for 2 to 4 ducks as a temporary setup, but it must be dumped and refilled every 1 to 2 days. A lined in-ground pond with a bog filter extends that to every 2 weeks.
What liner is safe for ducks?
Use pond-grade EPDM (45-mil) or RPE liner. Both are fish-safe and waterfowl-safe. Never use roofing-grade EPDM, which contains mildewcides toxic to ducks.