
Pond Pump Maintenance
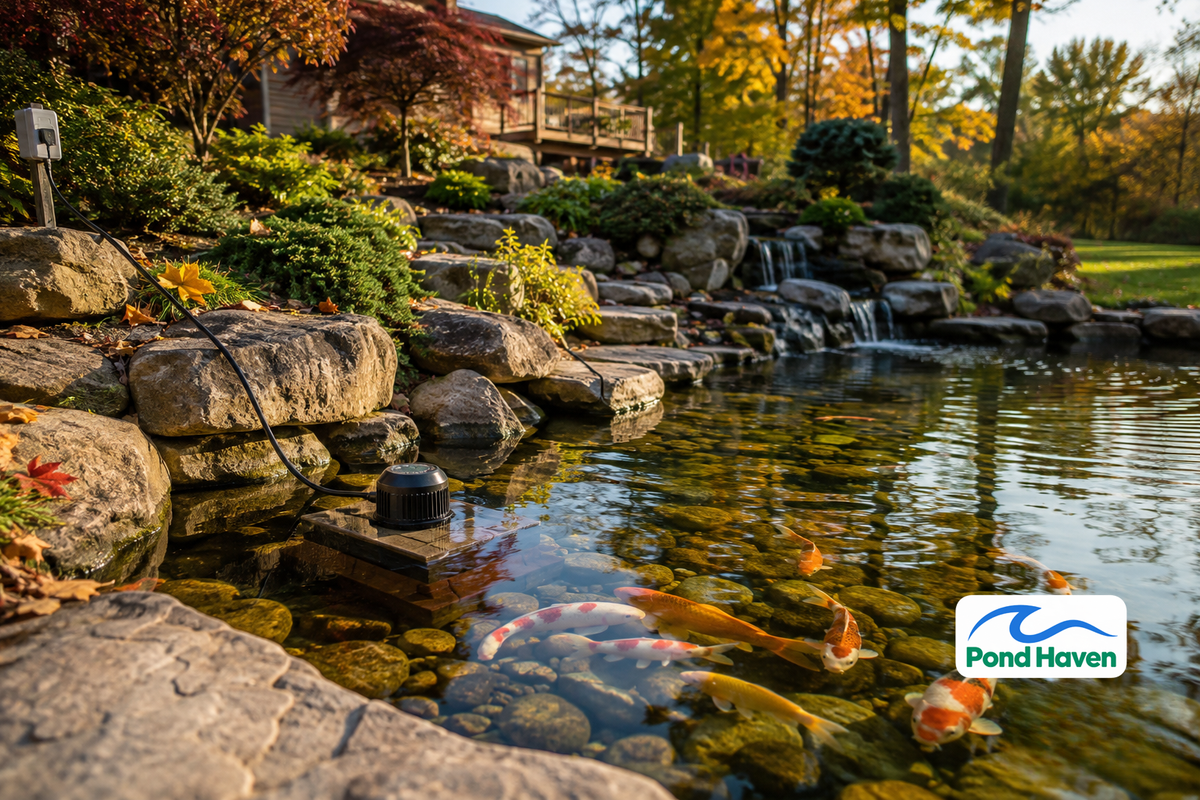

Your pond pump is the heart of your water garden. It moves water through your filter, powers your waterfall, and keeps oxygen levels where your fish and beneficial bacteria need them. Neglect it, and you're looking at premature failure, wasted energy, and a pond that turns green fast.
The cost math is simple. A $200 pump replaced every 2 years costs you $100 annually. A $200 pump maintained properly for 5 years costs $40 annually, plus a few dollars in vinegar and replacement O-rings. Industry guidance consistently points to improper lubrication and debris buildup as leading causes of premature pump failure, and biofilms can establish on pump surfaces in as little as 3 days.
This guide covers 15 actionable maintenance tips, from routine cleaning to winterization, plus a troubleshooting table and a maintenance schedule you can print and stick to. Whether you run a submersible pump in a backyard koi pond or a larger external unit on a small acreage lake, these protocols apply.
- Clean pre-filters and intake screens weekly during peak season; a clogged pre-filter can cut flow by up to 50%.
- Deep clean the wet end (impeller and housing) every 3 to 6 months using a 50/50 white vinegar and water solution.
- Test your GFCI outlet monthly and inspect power cords for cracks or exposed wire before every service.
- In cold climates, disconnect, clean, and store pumps indoors for winter; trapped water expands when frozen and cracks seals.
- Lubricate seals and bearings only with NSF H1-grade grease, which is certified safe for incidental water contact.
Understanding Your Pump: Know What You're Maintaining
Before you start wrenching, know the parts. A submersible pond pump has a few key components that need regular attention:
- Impeller: The rotating vanes that move water. It's the most failure-prone part.
- Wet end: The housing (volute) that contains the impeller. Internal buildup here causes overheating and reduced flow.
- Mechanical seal: Prevents water from entering the motor. A failing seal lets water in and destroys the motor.
- Intake screen and pre-filter: Your first line of defense against debris. They catch leaves, string algae, and grit before they reach the impeller.
Neglect is expensive. Calcium scale from hard water reduces hydraulic efficiency, meaning your pump works harder for less flow. Biofilms restrict water movement and harbor pathogens. The takeaway: a few minutes of preventive care beats a mid-summer pump failure every time.

The 15 Maintenance Tips
Routine Cleaning & Inspection (Tips 1-4)
Tip 1: Pull and Clean Your Pump Every 2-4 Weeks During Peak Season
Peak season means water temperatures above 60°F (15°C). That's when algae growth accelerates and biofilms establish fastest. Pumps cannot be maintained in place; they must be pulled from the pond.
The process takes 10 minutes:
- Disconnect power at the GFCI outlet.
- Remove the pump from the water.
- Rinse the exterior with a garden hose.
- Clear the intake screen of debris.
- Return the pump to its elevated position.
During the growing season, inspect the pump intake and clean pre-filters every 2 to 4 weeks to prevent flow restriction.
Tip 2: Clean Pre-Filters and Intake Screens Weekly
A clogged pre-filter can significantly reduce flow. That means your waterfall slows, your filter gets less water, and your pump strains against the restriction.
Rinse pre-filter sponges and intake screens with a garden hose weekly. Use a soft brush for stubborn debris. Replace screens when they show cracks, warping, or tears. Replace pre-filter sponges at least annually, or whenever they lose their shape and no longer spring back.
Tip 3: Use the Right Cleaning Agents
For mineral deposits and calcium scale, use a 50/50 mixture of white vinegar and water. Soak components for 15 to 30 minutes, then scrub with a soft brush. For organic buildup, mild dish soap works, but rinse thoroughly.
Never use bleach, harsh solvents, or a pressure washer on pump components. Chemical residues can kill fish and the beneficial bacteria that keep your pond balanced. Abrasive tools scratch surfaces, and those scratches become attachment points for biofilm.
Tip 4: Inspect the Intake Area and Pond Water Level
Keep your pump elevated 12 to 18 inches off the pond bottom. Sediment on the bottom contains decaying organic matter and anaerobic bacteria. Drawing that sludge into the pump clogs it and stresses the impeller.
Check the water level regularly. The pump should sit in at least 6 to 8 inches of water. If it runs dry, even briefly, the mechanical seal can fail from heat buildup. Trim surrounding plants so debris doesn't accumulate around the intake.
Deep Cleaning Procedures (Tips 5-7)
Tip 5: Disassemble the Wet End for Deep Cleaning Every 3-6 Months
Deep cleaning is different from routine rinsing. It means taking the pump apart and cleaning the internal housing where water is actually moved.
Do this when you notice reduced flow despite clean screens, visible scale buildup, or at seasonal transitions. The steps:
- Disconnect power.
- Remove the intake screen and volute (housing).
- Access the impeller and inspect the wear ring.
- Clean all surfaces.
- Reassemble in reverse order.
Take a photo of the screw placement before disassembly. It saves time and prevents cross-threading on reassembly.
Tip 6: Clean the Impeller and Housing Thoroughly
Debris wraps around the impeller shaft: hair, string, and filamentous algae. Remove it carefully. Use a soft toothbrush and the vinegar solution to dissolve scale from the impeller blades.
Never use metal tools on the impeller. Scratches create rough surfaces where algae and biofilm attach. After cleaning, verify the impeller spins freely by hand. Restricted rotation indicates internal debris or bearing wear.
If impeller blades show visible wear, chipping, or cracking, replace the impeller immediately. A damaged impeller causes motor strain and can lead to total pump failure.
Tip 7: Inspect Seals, Gaskets, and O-Rings
Examine every seal, gasket, and O-ring for cracks, hardening, flattening, or embedded debris. A failing mechanical seal lets water into the motor, which causes bearing failure and electrical shorts.
Replacement seals cost $10 to $30. A new pump costs $150 to $400. Replace worn seals promptly. When reassembling, ensure O-rings sit properly in their grooves; a pinched O-ring leaks.
Electrical & Safety Protocols (Tips 8-10)
Tip 8: Test Your GFCI Monthly
Every outdoor pond pump must connect to a Ground Fault Circuit Interrupter (GFCI) outlet. This is required by the National Electrical Code for water features. The GFCI shuts off power when it detects a current leak to ground, protecting you from electrical shock.
Test it monthly:
- Press the "Test" button. Power should cut immediately.
- Press "Reset" to restore power.
- If it fails to trip, call a licensed electrician immediately.
Tip 9: Inspect Power Cords and Connections
Check the entire cord length for cracks, nicks, or exposed wire. Verify the plug fits snugly in the outlet with no scorch marks or discoloration. Scorch marks indicate resistance and heat buildup.
Replace damaged cords. Electrical tape is not a permanent fix, especially outdoors where moisture is constant. Use waterproof, outdoor-rated connections and keep them elevated above water level where possible.
Tip 10: Disconnect Power Before Any Service
Unplug the pump. Don't just switch it off at a timer or switch. For hardwired pumps, flip the dedicated breaker and lock it out so no one accidentally restores power.
After disconnecting, let the pump sit for 10 minutes before handling. Capacitors can hold a charge that delivers a shock even when the pump is unplugged.
Performance Monitoring (Tip 11)
Tip 11: Use the "Listen, Look, Measure" Method Weekly
Catch problems early with a three-part weekly check.
Listen: Grinding, rattling, or whining indicates impeller imbalance, bearing wear, or clogging. A sudden increase in noise level means a developing mechanical problem.
Look: Check for excessive vibration, which signals misalignment or mechanical issues. Inspect the pump base and junction box for fluid leaks; leaking from the motor housing is a critical failure sign. Watch the waterfall or fountain output for reduced flow.
Measure: Track flow rate and amperage draw against baseline readings. Use an ammeter to monitor amperage; deviations from normal levels indicate overload, clogging, or mechanical failure. A noticeable drop in flow or a change in amperage signals a problem that needs investigation.
Document your readings. Baseline data makes it obvious when something changes.
Seasonal & Environmental Adaptation (Tips 12-13)
Tip 12: Follow a Seasonal Maintenance Calendar
Spring (water temps above 50°F/10°C): Full cleaning, seal inspection, and a test run before adding fish. Check and adjust pH annually.
Summer (water temps above 70°F/21°C): Increase cleaning frequency. Biofilm grows fastest in warm water. Clean filters weekly if needed.
Fall (water temps below 60°F/15°C): Remove leaves daily. Empty skimmer baskets frequently during leaf drop. Clean the pump thoroughly before winter.
Winter: See Tip 13 for climate-specific guidance.
Post-storm: After heavy rain, inspect the pond edge for erosion and monitor water quality for nutrient spikes. Debris washed into the pond can clog intakes quickly.
Tip 13: Winterize Properly for Your Climate
Your winterization protocol depends entirely on where you live.
Cold regions (IL, IN, MI, MN, NY, OH, PA, WI, ON): Disconnect, deep clean, and store the pump indoors in a frost-free location. Water trapped in the pump housing expands when frozen, cracking internal seals and the volute casting. Steps:
- Disconnect power.
- Remove the pump from the pond.
- Disassemble and clean all components.
- Dry everything completely.
- Store in a garage, basement, or shed.
Coil cords loosely to prevent kinking. Store with a desiccant pack to absorb moisture.
Mild climates (zones 8+): You can run pumps year-round, but reduce flow in winter and clean monthly. Ensure the pump sits at a depth where water temperature stays above freezing.
For fish survival in freezing climates, use a de-icer or pond warmer to keep an area of the surface ice-free. This allows oxygen exchange and lets gases from decaying debris escape.
Preventive Measures & Advanced Care (Tips 14-15)
Tip 14: Optimize Pump Placement and Protection
Elevate the pump 12 to 18 inches off the pond floor using bricks, blocks, or a purpose-built pump stand. This prevents sediment intake and reduces sludge load.
Use a pump bag or mesh protective bag around the pump. These catch large debris before it reaches the intake and also prevent frogs and other wildlife from entering the pump. Position the pump away from plant clusters and waterfall returns to prevent air locks.
In fall, reposition the pump away from leaf accumulation zones.
Tip 15: Lubricate Seals and Bearings Correctly
Use only lubricants rated safe for incidental food or water contact. Lubricants designed for non-contact industrial applications may contain toxins harmful to fish.
Apply a thin film. A properly functioning mechanical seal rides on a lubricating film measured in microns. Too much grease attracts debris and causes overheating. Too little causes friction and seal failure.
For pumps with oil chambers, take an oil sample monthly. Milky oil indicates water intrusion and seal failure.
Check your pump manual for the specified grease type before applying anything. Using the wrong lubricant on a sealed bearing can void your warranty and cause premature failure.
Specialized Pump Care: Solar-Powered Pumps
Solar pumps need attention to both the pump and the panel array.
Clean solar panels monthly in dry climates. Heavily soiled panels can lose a significant portion of their output, directly reducing pump performance. Use a soft cloth and mild soapy water, or a 1:8 vinegar-to-water solution. Clean in the early morning or evening; cleaning during peak sun can damage the anti-reflective coating.
Keep water pressure below 100 PSI. Use deionized or distilled water to prevent mineral spotting. Never use blades, steel wool, or abrasive brushes.
Check connections monthly. Vibration can loosen wiring over time. In cold climates, store panels indoors during winter.
Troubleshooting Guide: Symptoms, Causes, and Fixes
| Symptom | Likely Cause | Immediate Action |
|---|---|---|
| Pump runs but no water flows | Clogged intake, air lock, or impeller blockage | Disconnect power, clean intake screen and impeller, check for air lock |
| Pump won't start | Tripped GFCI, blown fuse, or failed capacitor | Test GFCI, check breaker, inspect cord; call electrician if GFCI won't reset |
| Reduced flow | Clogged pre-filter, scale buildup, or worn impeller | Clean pre-filter, soak wet end in vinegar solution, inspect impeller |
| Loud noise or vibration | Debris in impeller, failing bearing, or cavitation | Disconnect power, clean impeller, check for wear; replace bearing if needed |
| Pump cycles on and off | Overheating, low water level, or electrical issue | Check water level, clean pump, verify amperage draw |
| Milky oil in seal chamber | Water intrusion, seal failure | Replace mechanical seal immediately |
Dry running is the most damaging failure mode. Always keep the pump submerged. If a pump runs dry, replace the seals before returning it to service.

Maintenance Schedule Checklist
| Frequency | Tasks |
|---|---|
| Daily | Check water level; skim floating debris; listen for unusual noises |
| Weekly | Clean pre-filter and intake screen; check water clarity; monitor flow output; test GFCI |
| Monthly | Full exterior cleaning; inspect cords and connections; check impeller for debris; rinse bio media in pond water |
| Quarterly | Deep clean wet end; inspect seals and O-rings; lubricate if specified; megohm test (if you have the equipment) |
| Seasonally | Spring startup inspection; fall cleanup; winterization or reduced-flow adjustment |

Documentation & Professional Help
Keep a maintenance log. Record the date, tasks performed, readings taken, and parts replaced. This serves two purposes.
First, warranty claims often require proof of reasonable upkeep. Most pump warranties, like the 2-year standard plus 1-year with registration on smartpond models, can be voided by documented neglect.
Second, tracking performance data helps you spot trends. A gradual flow decline over months points to scale buildup. A sudden amperage spike points to a mechanical problem.
Schedule an annual professional inspection for hardwired or large pumps. Professionals can perform thermal imaging to detect hot spots, test insulation resistance with a megohmmeter, and inspect internal components you can't easily reach.
Call a pro when you have persistent issues, electrical problems, or need seal replacement on high-end pumps. Some tasks are worth the service call.
Frequently Asked Questions
How often should I clean my pond pump?
Rinse the exterior and clean pre-filters weekly during peak season. Pull the pump for a full cleaning every 2 to 4 weeks when water temps are above 60°F. Deep clean the wet end every 3 to 6 months, or whenever flow drops noticeably.
Can I use bleach to clean my pond pump?
No. Bleach residue can kill fish and the beneficial bacteria that power your biological filter. Use a 50/50 white vinegar and water solution for mineral deposits and mild dish soap for organic buildup. Rinse everything thoroughly before reassembly.
Why is my pond pump making noise?
Grinding or rattling usually means debris is wrapped around the impeller or a bearing is failing. Disconnect power, pull the pump, and inspect the impeller. If it spins freely and the noise persists, the bearing likely needs replacement.
Do I need to take my pond pump out for winter?
In cold climates where water freezes, yes. Disconnect, clean, dry, and store the pump indoors. Water trapped in the housing expands when frozen and cracks seals. In mild climates (zones 8+), you can run pumps year-round with reduced flow.
How do I know if my pond pump needs replacing?
Replace the pump when repairs cost more than half the price of a new unit, when the motor shows signs of water damage, or when the impeller is worn beyond replacement. A well-maintained pump lasts 5 to 7 years; a neglected one lasts 2 to 3.
A consistent maintenance routine is the difference between a pump that runs for years and one that fails mid-summer. Start your maintenance log today, set a recurring reminder for weekly checks, and your pump, your fish, and your water clarity will all thank you.