
How to Dig a Pond
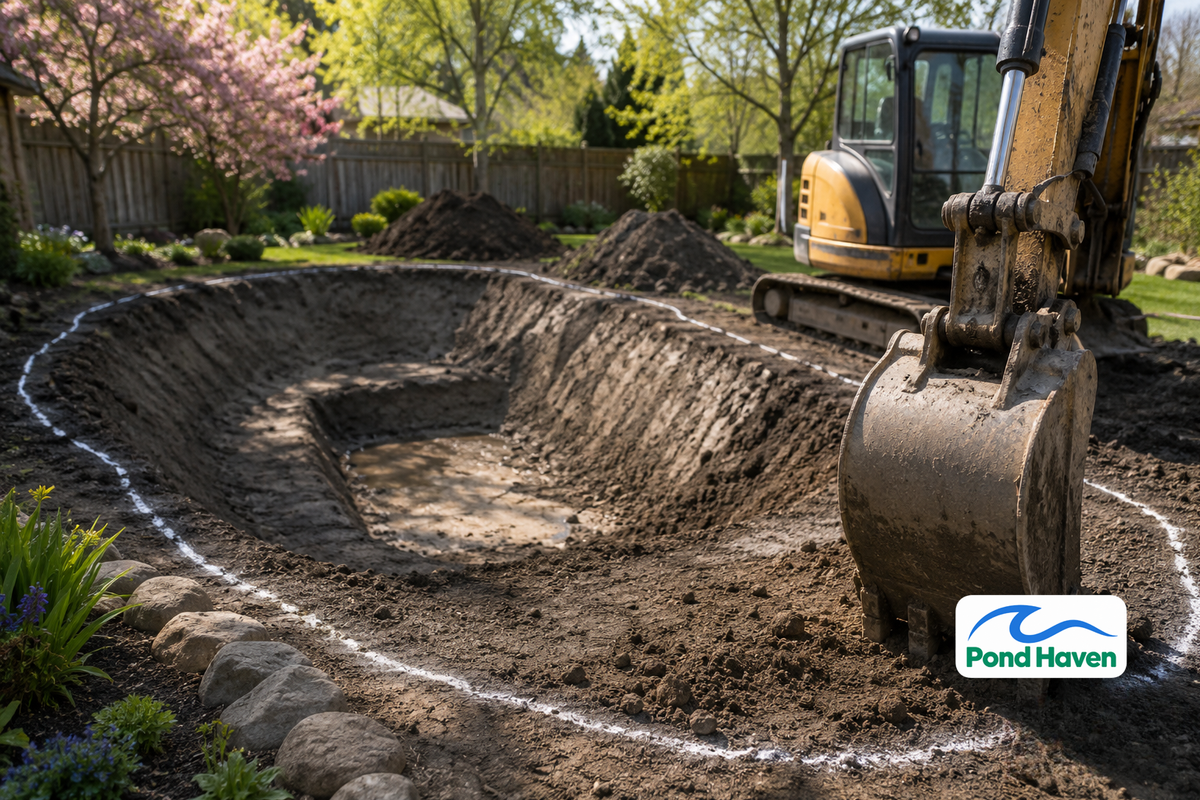

Digging a pond is one of the most rewarding projects you can tackle on your property, but it's also one of the most unforgiving. Get the planning wrong and you'll discover it two years later, when your banks are slumping and your water won't hold. Fixing a failed pond almost always costs more than building it right the first time.
This guide walks you through the entire process: planning, design, excavation, waterproofing, finishing, and startup. You'll get the specific numbers you need, from clay content thresholds to liner sizing formulas, so you can dig with confidence.
- Test your soil before you dig: you need at least 38% clay content for a natural seal, confirmed by a 2-inch ribbon test.
- Cut all side slopes at 3:1 or flatter, or your banks will erode and collapse.
- Size your liner with this formula: length + (2 x max depth) + 2 ft overlap on each side.
- Call 811 for utility locates before any digging, and use cave-in protection for any excavation over 5 ft deep.
- Plan for aeration and pump systems before you fill the pond, not after.
Phase 1: Planning & Design
Defining Your Pond's Purpose
Every pond starts with a purpose, and that purpose dictates depth, shape, and equipment. Here's how the numbers break down by pond type:
| Pond Type | Depth | Key Requirements |
|---|---|---|
| Wildlife pond | 2-3 ft max | Varied shallows, planted shelves, no fish |
| Koi pond | 3-4 ft min, 5-6 ft preferred | Aeration, predator protection, thicker liner |
| Game fish pond | 8-12 ft | Overwintering depth for northern climates |
| Livestock pond | 6-8 ft | Gradual ramp access, high water volume |
| Aesthetic/reflection | 2-4 ft | Shape and edging matter more than depth |
There's also a critical distinction most guides skip: excavated ponds versus embankment ponds. An excavated pond (also called a dugout) sits entirely below grade, with water held by the surrounding soil. An embankment pond uses a dam or berm to hold water above grade. This guide focuses on excavated ponds. If you're planning an embankment pond over 3 ft tall, you likely need an engineer and a dam safety permit.
Site Assessment: Soil Testing and Drainage
Location matters as much as depth. You want at least 6 hours of direct sun for healthy aquatic plants, and you should stay at least 10-15 ft from building foundations. Keep clear of trees, whose roots will puncture liners and whose leaves will clog your pond.
The most important test is the clay ribbon test. Here's how to do it:
- Take a handful of moist soil and squeeze it into a ball.
- Press the ball between your thumb and forefinger, pushing the soil out into a ribbon.
- If the ribbon forms and holds for 2 inches or more before breaking, you have sufficient clay.
That 2-inch ribbon indicates roughly 38% clay content, the minimum threshold for a natural clay seal. Below that, your pond will leak unless you add bentonite or install a liner.
The jar test gives you a fuller picture. Fill a clear jar one-third full with soil, add water, shake it, and let it settle for 24 hours. The sand settles first, then silt, then clay on top. Measure each layer to estimate your soil composition.
Finally, run a perk test. Dig a 12-inch test hole, fill it with water, and time how fast it drains. Fast drainage means you'll need a liner or bentonite, no matter what the ribbon test suggests.
Permits and Legal Requirements
Before you break ground, handle the paperwork. Start by calling 811, the national utility locator service. This is legally required in most jurisdictions, and it's free. Do this even for shallow test holes.
Permit requirements vary by state and county, but you'll typically need:
- An excavation permit for ponds over 1 acre or deeper than 5 ft
- A dam safety permit for embankment ponds over certain height and volume thresholds
- Stormwater and erosion control permits in many areas
The NRCS 378 standard (the Natural Resources Conservation Service's pond construction standard) governs many cost-share programs and permits. Check with your local NRCS office early in the process.
Typical setback requirements are 50-100 ft from wells and septic systems, and 10-25 ft from property lines. If your site has standing water or hydric soils, you may need a Section 404 permit from the Army Corps of Engineers.
Final Design: Depth Zones, Slopes, and Overflow
Design your pond on paper before you dig. You need four things nailed down:
Depth zones. A single flat-bottomed hole is a recipe for a dead pond. You need variety: a deep zone for fish and temperature regulation, shallow shelves for plants, and a gradual slope for wildlife access.
Side slopes. This is non-negotiable: cut all slopes at 3:1 or flatter (3 ft horizontal for every 1 ft vertical). Steeper slopes erode, collapse, and trap animals. For a 6-ft-deep pond, that means the slope extends 18 ft horizontally on each side. A 4:1 slope is even better for wildlife.
Plant shelves. Cut a shelf 12-18 inches deep and 12-24 inches wide around the perimeter. This holds marginal plants like cattails and irises. Most planting shelves should sit 6-8 inches below the finished water level.
Overflow. Every pond needs a way to shed excess water. Size your overflow pipe to match your pond's surface area: a 4-inch pipe handles ponds up to 1,000 sq ft. Direct overflow away from structures and toward a drainage swale.
Phase 2: Excavation & Shaping
Safety First: OSHA Rules
Excavation is dangerous work. Cave-ins are the leading cause of death in excavation accidents, and they're almost always preventable.
The OSHA trenching standard (29 CFR 1926.652) requires cave-in protection for any excavation deeper than 5 ft. That means shoring, shielding, or sloping the walls back at the required angle. The required slope depends on your soil type:
- Type A soil (stable clay): 3/4:1 slope
- Type B soil (silt, sandy loam): 1:1 slope
- Type C soil (sand, gravel): 1.5:1 slope
Keep spoil piles at least 2 ft from the excavation edge, more for deep ponds. Provide a ramp or ladder for entry and exit, and never work alone in a deep hole.
Marking the Layout
Stake out the full perimeter before any equipment arrives. Remember that your excavation footprint is larger than your waterline. A 20x30 ft pond with 3:1 slopes and 6 ft depth needs roughly 56x66 ft of excavation area.
Use spray paint or stakes to mark the outline. Verify all perimeter points are level with a line level or laser level, and set the perimeter at least 2 inches above your planned final water level.
Clear all vegetation from the footprint, and strip the topsoil separately. Organic material decomposes and causes uneven settling, so keep it out of the pond basin. Stockpile topsoil for later use around the pond edge.
Choosing Your Equipment
Your equipment choice depends entirely on pond size:
| Pond Size | Equipment | Cost |
|---|---|---|
| Under 100 sq ft | Manual digging | 20-40 hours of labor |
| Up to 500 sq ft | Mini excavator (1.5-3 ton) | $200-400/day rental |
| Up to 1,000 sq ft | Compact excavator (3-8 ton) | $300-500/day rental |
| Over 1,000 sq ft | Full-size excavator (10-20 ton) | $100-150/hour with operator |
| Large acreage | Bulldozer + sheepsfoot roller | Varies by project |
Manual digging is only realistic for tiny wildlife ponds. A motivated digger moves about 1-2 cubic yards of soil per day, and a 100 sq ft pond requires excavating 10-20 cubic yards. Do the math before you commit to a shovel.
For anything over 500 sq ft, rent a machine. A mini excavator handles tight access and digs to 8-10 ft. A full-size excavator is needed for ponds over 1,000 sq ft or depths over 6 ft.
If you need a 20-ton machine, have rocky soil, or are building an embankment pond over 6 ft deep, bring in an experienced operator. The rental cost of a machine you can't handle far exceeds the cost of a professional who finishes in days.
Step-by-Step Digging Sequence
Follow this sequence for a stable, well-shaped basin:
Step 1: Dig the center first. Excavate the deepest zone before shaping the edges. This lets water drain away from your working face.
Step 2: Create the deep zone. Dig to your target depth, checking with a laser level or string line. For fish ponds, ensure a flat bottom at the design depth.
Step 3: Cut plant shelves. Leave a 12-18 inch deep bench around the perimeter, 12-24 inches wide. Each tier must have a level horizontal surface.
Step 4: Shape the slopes. Work from the deep zone outward, cutting slopes at 3:1 or flatter. Don't undercut the slope base, which causes slope failure.
Step 5: Compact the basin. Use the excavator bucket or a vibratory compactor to compact the floor and slopes in 6-inch lifts. This prevents later settlement.
Step 6: Remove sharp objects. Pull out every rock, root, and piece of debris that could puncture a liner or create weak points in clay.
Step 7: Install underlayment. If you're using a liner, lay geotextile fabric over the entire basin before the liner goes down.

Phase 3: Waterproofing the Basin
Choosing Your Seal
Your soil test determines your sealing method. Here are the three options:
Compacted clay works only if your soil has 38% or more clay content. You excavate, re-place the clay in 6-inch lifts, and compact each lift at optimum moisture content. The final compacted liner should be at least 24 inches thick. This is the cheapest option if you have the right soil, and it lasts indefinitely if properly compacted. The catch: you need to dig your basin 24 inches deeper than your final depth to accommodate the liner.
Bentonite is for sites with 15-38% clay content. This volcanic clay expands when wet, filling voids and creating a seal. Spread 1-2 lbs per sq ft, mix it into the top 4-6 inches of soil, and compact. Expect to pay $1,000-3,000 for a 1,000 sq ft pond. It's permanent, but burrowing animals and freeze-thaw cycles can disturb it.
Flexible liner is for sandy or rocky soils with less than 15% clay. It's also the best choice for small to medium ponds and irregular shapes. Costs run $0.50-1.50 per sq ft for material, plus underlayment.
Liner Types Compared
| Liner | Thickness | Lifespan | Cost per sq ft | Best For |
|---|---|---|---|---|
| EPDM | 45 mil standard, 60 mil rocky sites | 30-50 years | $0.80-1.50 | Most residential ponds |
| PVC | 20-30 mil | 10-20 years | $0.50-0.80 | Budget projects, small ponds |
| Butyl | 30-40 mil | 40-60 years | $1.50-2.50 | Large ponds, maximum durability |
EPDM (ethylene propylene diene monomer) is the most common choice for residential ponds. It stays flexible in cold weather, resists UV damage, and shrugs off punctures. The 45 mil thickness is standard for residential ponds; step up to 60 mil for rocky sites.
PVC is cheaper but stiffer in cold weather and more prone to punctures. UV degradation starts after 5-7 years if exposed. It's a budget option, not a long-term one.
Butyl is the premium choice. It has the best puncture resistance and flexibility of any liner, and it lasts 40-60 years. It's the standard for large ponds and reservoirs.
Liner Sizing and Installation
The sizing formula is simple: length + (2 x max depth) + 2 ft overlap on each side, and the same for width.
For a 20 ft long, 6 ft deep pond: 20 + 12 + 4 = 36 ft of liner length.
Installation steps:
- Lay 8-10 oz geotextile underlayment over the entire basin, overlapping seams by at least 12 inches.
- Unfold the liner in the sun for 1-2 hours to soften it.
- Position the liner with even overhang on all sides. Don't drag it across sharp edges.
- Fill with 2-3 inches of water to seat the liner into the contours.
- Smooth wrinkles from the bottom up, working outward.
- Anchor edges with rocks or soil, leaving slack for settling. Don't trim excess until the pond is full.
Phase 4: Finishing & Systems
Plumbing: Inlets, Drains, and Overflow
Install plumbing before you finish the edges. Key placements:
- Bottom drain: Optional but recommended for fish ponds. Install before the liner, or through a boot in the liner.
- Overflow pipe: Install at your designed water level, typically 4-6 inches below the pond edge.
- Inlet pipes: Offset them 1-2 meters from the corners, not at the corners themselves. Position the inlet at least 30 cm below the water surface.
- Skimmer: For fish ponds, install at the waterline to catch debris.
Use 4-inch non-pressure PVC for drainage runs, with a slope of 1/8 to 1/4 inch per foot.
Edging and Coping
Edging secures the liner, prevents erosion, and gives the pond a finished look. Options include natural stone, poured concrete, precast coping, pavers, and timbers.
Set coping stones on a mortar bed or compacted sand base, overlapping the liner edge by at least 2-3 inches. Keep butt joints tight so soil can't wash into the pond.
Planting for Stability
Vegetation anchors your banks and establishes the ecosystem. Plant in zones:
- Marginals (cattails, irises, pickerelweed): 0-12 inch shelves
- Deep marginals (water lilies, lotuses): 12-36 inch zones
- Oxygenators (Anacharis, Hornwort, Cabomba): deeper zones
- Floaters (water hyacinth, water lettuce): surface cover
Seed or sod all exposed surfaces to stabilize the soil. If vegetation won't establish, use a gravel mulch.

Phase 5: Filling & Startup
The First Fill and Leak Testing
Fill slowly, over multiple days if possible. This lets the liner seat properly and the clay hydrate and swell. For clay-lined ponds, maintain the water level for 2-4 weeks to allow the clay to fully seal.
Monitor the water level for 24-48 hours. A drop of more than 1/2 inch per day, excluding evaporation, indicates a leak. Check seams, pipe penetrations, and edges first.
Establishing the Ecosystem
Don't add fish immediately. The pond needs time to establish biological filtration. Here's the sequence:
- Add beneficial bacteria to kick-start filtration.
- Plant oxygenators and marginals first.
- Wait 2-4 weeks for water parameters to stabilize.
- Add fish gradually, monitoring ammonia, nitrite, and pH levels.
In cold climates, your deep zone must extend below the frost line for fish survival. A de-icer may be needed in severe winter areas.
Sizing Your Pump and Aeration
Your pump and aeration system keep the pond alive. Sizing them correctly matters more than brand.
Pump sizing: For a decorative pond, you want to circulate the total water volume at least once every 2 hours. For a fish pond, once per hour. A 1,500-gallon koi pond needs a pump rated at 1,500 GPH minimum.
Aeration: Fish ponds need supplemental oxygen, especially in summer heat and winter ice. Diffused aeration systems are the most efficient: they release fine bubbles from the pond bottom, circulating the entire water column. A single diffuser handles roughly 1 acre-foot of water (about 325,000 gallons). For smaller ponds, a fountain aerator provides surface agitation and visual appeal.
Plan your power source before you fill the pond. Shoreline outlets need GFCI protection. If you don't have power at the pond site, budget for a solar aeration system or an electrician to run a line.

Choosing a Pond Kit vs. Building from Scratch
If the full DIY process feels overwhelming, pond kits simplify things considerably. A complete kit bundles the liner, underlayment, pump, filter, and often the skimmer and plumbing fittings into one package.
Pond kits are ideal when:
- Your pond is under 500 sq ft
- You want a proven, matched system
- You'd rather not spec each component separately
Build from scratch when:
- Your pond exceeds 500 sq ft
- You have unusual site conditions
- You want specific components (e.g., a diffused aeration system instead of a fountain pump)
Pond Kit Advantages
- Matched components that work together out of the box
- Simpler sizing: the kit is rated for your pond's gallons
- Often cheaper than buying components separately
Pond Kit Disadvantages
- Limited to standard sizes and shapes
- Pumps may be undersized for heavy fish loads
- Less flexibility for custom features like waterfalls
Frequently Asked Questions
How deep should I dig my pond?
It depends on your goal. Wildlife ponds need only 2-3 ft. Koi ponds need 3-4 ft minimum, with 5-6 ft preferred. Game fish in northern climates need 8-12 ft to survive winter. Livestock ponds need 6-8 ft with a gradual ramp. Match depth to purpose, not to what looks good.
How do I know if my soil will hold water?
Run the clay ribbon test. Squeeze a moist soil ball between your thumb and forefinger; if it forms a ribbon that holds for 2 inches or more, you have at least 38% clay content, enough for a natural seal. Below that threshold, you'll need bentonite or a flexible liner.
Do I need a permit to dig a pond?
Most likely, yes. Excavation permits are common for ponds over 1 acre or deeper than 5 ft. Embankment ponds over 3 ft tall may trigger dam safety regulations. Check with your county planning office and call 811 for utility locates before any digging.
How much does it cost to dig a pond?
A small DIY pond with a liner kit runs $500-2,000. A medium pond with rented equipment costs $2,000-5,000. Large ponds with professional excavation run $5,000-15,000 or more. Liner material alone runs $0.50-1.50 per sq ft, plus underlayment and labor.
How long does it take to dig a pond?
A small backyard pond takes 3-7 days. A midsized garden pond takes 1-2 weeks. Large agricultural ponds take 2-4 weeks. Professional excavation and shaping typically completes within 1-2 weeks, not counting permits, filling, and planting.
Digging a pond is a big project, but the steps are proven. Test your soil, design your depths and slopes, excavate safely, seal the basin properly, and finish with the right pump and aeration. Do that, and your pond will hold water and support life for decades.